Your home is far more than just a place to reside, it’s where you live. It provides a feeling of safety and security, like a mother’s hug. It’s the place you want to be when everything around you is falling apart.
If your home is a place of shelter you don’t want it to be the thing falling apart.
Whether you rent or own your home, it’s one of your biggest investments. It’s where you spend much of your time, money, and life. With it being this important, you need to take care of it.
If our homes are so important, why are they neglected?
We are creatures of habit, whether good or bad. We preform our daily routines of coming and going and rarely bother to look around. Unless a doorknob falls off in our hand or there’s no hot water for our shower, or the sink gets stopped up, or the AC doesn’t work, or any number of other problems occur, we just go through life without giving any thought to the condition of our homes.
Maintenance isn’t going to prevent every big problem from happening, but it decreases the likely hood. Having a scheduled maintenance plan will also help you find needed repairs before they become major.
Having an intentional plan is important, but it won’t work if you don’t use it.
With everything else going on in life, how can we remember one more thing? We don’t have to if we have a scheduled plan. First you need to decide if home maintenance is important enough for you to bother with. If it doesn’t bother you when you’re forced to deal with a big problem, then don’t worry about it. You’ll know the sump pump has quit working when you replace the carpet, baseboard and lower portion of the sheetrock in your basement.
The most important part of the maintenance plan is having a system in place that works for you. I use my computer calendar for this. I can set reminders for different time periods and it will automatically remind me. Just this last weekend I was reminded that is was time to clean the coffee maker. If it hadn’t been for the reminder it wouldn’t have gotten done. Whether you use a computer, a paper calendar or something else, you need to follow through regularly.
The overwhelming maintenance mountain becomes manageable if you break it down into shovel size amounts.
Your home and life are specific to you. Your maintenance plan needs to be designed to fit those specificities. Different manufacturers of appliances and home equipment will have their own recommendations, so you should schedule your plan around that. If you have hard well water you might need to clean faucets, shower heads, coffee makers, etc. more often than recommended. If you don’t use some things regularly, they might need less maintenance.
Next week we’ll dig deeper into the specifics of what a maintenance plan includes, complete with a downloadable Home Maintenance Checklist for you to use.
Not so fast. Using these steps and simple tips will make for less mess, a more productive use of your time and a finished project that will rival the professionals.
Start at the beginning.
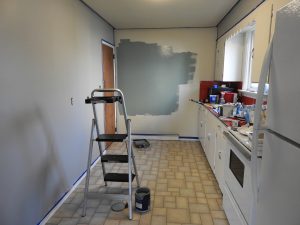
Preparing the room before you open the first can of paint will pay dividends in the end. This is my recommended order, but these steps can vary for your particular situation or preference.
1 – Remove ceiling fan blade and/or light fixture globes. Cover the fixture base with masking tape and plastic.
2 – Remove furniture from the room if possible or move it to the center of the room if not. The less you have to work around the easier it will make the job. If you leave furniture in the room cover the floor where the furniture will go, set the furniture on the covering, then cover the furniture.
3 – Remove area rugs, window treatments, wall hangings (including nails and/or screws) and switch and receptacle cover plates, anything that you can, that you don’t want painted or broken.
4 – Cover floor with drop cloths, plastic or a combination depending on your preference. Drop cloths are a less slick surface and are designed to be reused. Plastic is slicker to walk on and moves around more but can be thrown away when you’re finished.
5 – Check walls for damaged areas or nail holes that need to be repaired or filled. Fill larger repairs with light weight spackle or drywall compound. Fill nail and screw holes that won’t be reused with light weight spackle or caulking. Make sure repairs are smooth and ready for paint by sanding if needed.
6 – If the window and door casing and/or the base board are going to be painted then caulk gaps between the trim and the wall. If it’s not going to be painted…
7 – Tape off window and door trim and base board with masking tape and plastic unless you’re really good with a paint brush.
8 – Clean the walls. The best way to do this depends on the finished texture of the wall. If it’s smooth, it can be wiped down with a damp cloth. If it’s textured start with a shop vac using a brush attachment and then wipe down with a damp cloth. If it has been painted prior, then clean the walls with soap or a mild cleaner and water. Make sure it’s dry before applying primer or paint.
Start at the top and work your way down. Gravity works on drips, splatters and runs just like everything else. Not to say that Paint can’t fly up off a roller, etc., but the odds are in your favor when you begin with the ceiling. The directions included here are based on painting both walls and ceiling. Just like preparing the room, this is the order I recommend.
1 – Start by cutting in the ceiling. Paint a 2”-3” strip from the wall and around fixtures on the ceiling. This allows you to get the roller close (if you’re really careful) without getting paint on the walls. The brush and roller leave the paint with a different pattern. This is why it is better to cut in with the brush first and then to roll as close to the edge as possible for a more uniform finish.
2 – Using a roller and extension pole, start at a wall on the short side of the room. Roll long strokes, maintaining a wet edge. If you’re painting unpainted drywall, I recommend using a primer. The primer provides adhesion to the surface. After the primer has dried then apply the paint. Typically, ceilings are painted with a low sheen flat finish.
3 – After the ceiling is finished next come the walls. Some people prefer to start with the millwork, and some would rather do it last. It’s up to you which you prefer. Either way when painting the walls cutting in is next thing. Start by painting a 2”-3” strip on the wall from the ceiling. Next paint a 2”-3” strip both ways in wall corners unless two connecting walls are going to be different colors. Paint a 2”-3” wide strip around all window and door casing, baseboard and any other fixed object.
4 – Using a roller and extension pole, start at a corner of the room. Working away from the corner roll long strokes, maintaining a wet edge. Just like the ceiling, if you’re painting unpainted drywall use a primer. After the primer has dried then apply the paint. I recommend putting on two coats for better coverage and durability.
5 – Once the paint has dried remove the tape and plastic. Be careful when pulling the tape that you pull away from the finished surface. This will give a cleaner finished paint line. Like with painting if you start at the top and work your way down it will make clean up easier. Pull the plastic from the corners of the room rolling it into itself, keeping the majority of the mess inside, then throw it away.
6 – Now it’s time to move things back into the room and enjoy the fresh new look. Be careful with the fresh paint for a few days, it is softer and more easily damaged until it has finished curing.
Tips and technics:
• Hold the brush close to the bristles, it gives you more control.
• Only dip ¼ to ½ of the bristles (approximately 1”-2”) into the paint. Anymore is unnecessary, it’s messier, wasteful and harder to clean up.
• To minimize drips, tap or lightly wipe one side of the bristles on the top edge of the can.
• Put holes in the bottom of the groove around the top edge of the paint can where the lid sets down in using a small punch or a nail. This allows the paint that gets caught in the groove to escape back into the can when putting the lid back on.
• When cutting in with a brush start at a corner and work away from it initially. Then reverse your direction by starting the next stroke away from the corner and working back over the previously applied paint. Continue this process with each new dipping of the brush.
• To get the cleanest paint line use a tapered brush and parallel the width of the brush with the corner. Begin with the bristles a little way from the corner and then as you move the brush parallel with the corner gradually move closer to the corner.
• When rolling paint on large flat surfaces, i.e. walls and ceilings, start in a corner. As you apply more paint move to just past the previously painted area and while rolling back and forth work back over the previously painted area. Continue this process as you work across the surface being painted. This helps prevent having thin spots and paint lines.
• Roll the paint from top to bottom on a wall, especially with higher sheen finishes. When only rolling a top or bottom portion of a wall there is a risk of there being an area of heavier coverage in the middle and often this will be visible and create a horizontal paint line on the middle of the wall.
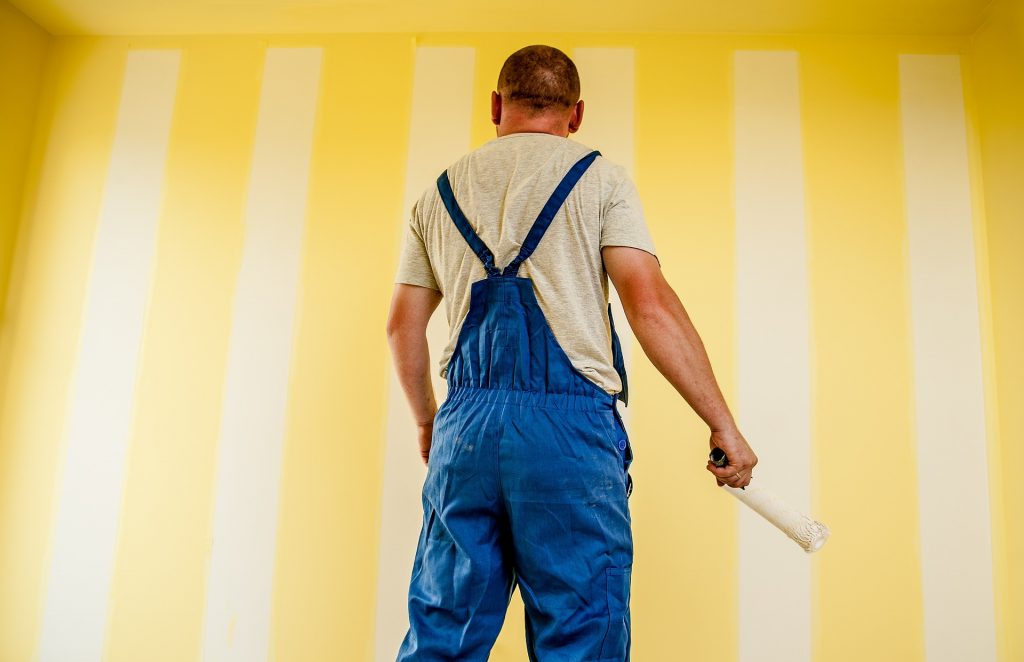
Painting is one of the things that many times people do themselves to save money. Really, how hard can it be to just roll some paint on a wall?
As you can see in in this “How to Paint the Interior of Your Home” series of posts…there’s more to doing a painting project “well” than it appears. Before you start painting you need to consider the amount of time and effort you will spend. Even though the price for hiring a professional seems expensive, you need to determine what your time is worth. Because, it will take longer than you think.
Just like a painting project takes longer than initially expected, so did the explanation of it. What I thought would be a short post turned into two and now looks to be three. Next week we’ll see if we’re able to accomplish this.
Last week I told you to start with determining the right paint depending on what the rooms use was. Next was picking your colors which is one of the most important things to the outcome. What, in the beginning, would seem to be easy, often turns into one of the most difficult.
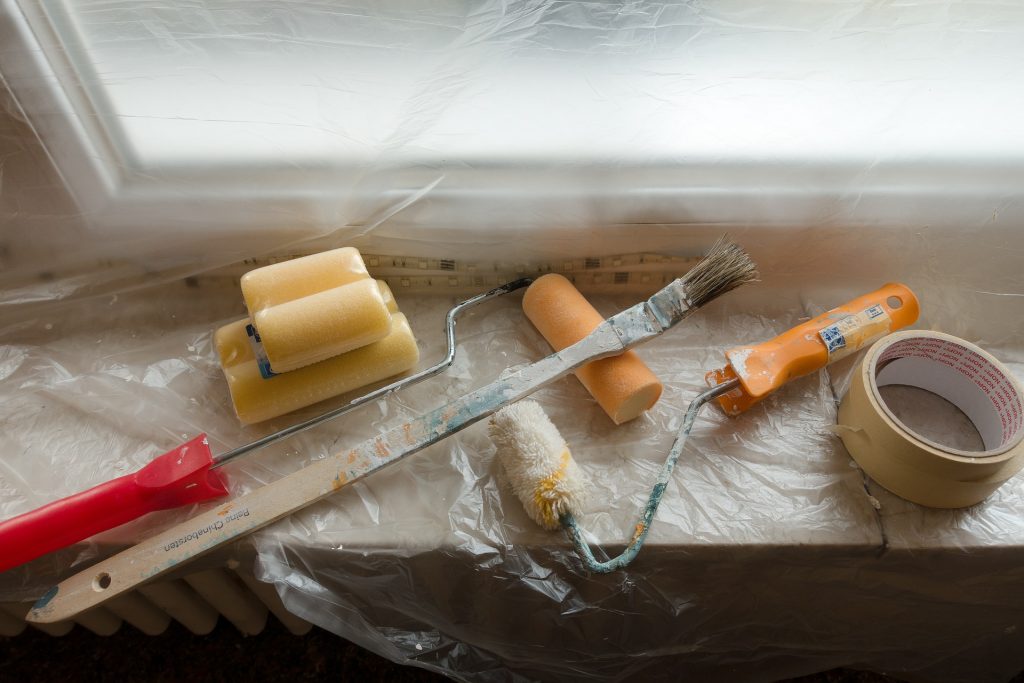
Figuring out what tools you need, is the next step. Painting is like any other project, having the right tools will make the project go smoother, easier and make for a better outcome. Even with basic tools like brushes and rollers there is an amazing amount of variety and options. Then of course there is too many specialty tools to go into.
Brushes:
Natural bristle (sometimes called China bristle) for oil-based finishes. These bristles are made from animal hair. The natural split ends of these bristles hold more paint and allow a nice smooth finish
Blended nylon/polyester bristle for latex paints. The combination of these bristles provides a durable long-lasting brush. The polyester is great at holding its shape and the nylon holds up well.
Polyester bristles work well in latex paints but aren’t as durable as the combination bristles. They provide a smoother application of paint than the combination.
Sizes typically range in width from 1” to 4”. Depending on what you are doing will determine which width provides the best result. Smaller brushes work best for trim and small areas. The bigger brushes provide more coverage on large flat areas.
Styles or bristle ends also serve different specific purposes. An angled brush works best for cutting in around windows, doors, etc. or in corners. The angled cut gives you more control over the paint line. Flat brushes work best when the goal is to get paint on larger flat surfaces.
Rollers:
Fabrics used for roller covers are similar to brushes in that some are natural, and some are synthetic. The synthetic is the most common and is ideal for latex paints. The natural covers are made of mohair or wool. These work best with oil-based paints. Blended covers provide the best of both worlds. They have the product pick up of wool and the longevity of nylon.
Pile depths of roller covers vary from short (almost smooth) to long (3/4” -1”). The short nap is for smooth surfaces. The rougher the surface the longer the nap needed.
Misc. tools and sundries:
Drop cloths or plastic for covering finished floors or furniture that will remain in the room.
Tape and plastic or painter paper for covering windows, doors, floor perimeters, trim, electric fixtures, hardware, etc. Most of us are aware of the blue painters masking tape. It was designed to be used on painted surfaces and not pull the paint loose when it was removed. Now there is green (multi-surface) and yellow (delicate) tape as well.
Caulking, spackling, drywall mud for filling cracks, nail holes and repairing damaged areas. Caulking works best when filling joints and cracks where two different materials come together, for example wood trim and drywall. It allows for expansion when the two things expand and contract at different rates. Spackling is light weight and faster drying than sheetrock mud and works great for filling nail holes and small repairs. Drywall compound dries slower and depending on the size of repair will most likely shrink and need multiple coats but is more durable than spackling.
Ladders, stools and planks are needed to cut in the corner where the ceiling and wall meet, the tops of windows and doors or ceiling fixtures. Once the cut in is complete then everything in a typical room can be reached with a roller pole. Some rooms with high vaulted ceiling may require scaffolding.
Roller handles, poles, pans, liners and screens are all parts of the paint rolling process. Many times, people don’t distinguish the difference of these things. The roller handle is what the roller cover slides onto. The pole is what the handle screws onto and often is adjustable in length. The pan is what paint is poured into for the roller to pick up the paint from. There are pan liners that fit in the pans which can make the clean up process easier. There are also screens of different sizes that fit into different sized buckets. You can then dip the roller directly into the bucket of paint and remove the need for a pan.
Now we’ve determined the right paint, picked the colors we want and figured out what tools we need. After all of that, it’s time to get started painting.
Next week we will discuss the process of preparing the room and putting some paint on the walls.
If you have any questions or thoughts about what we’ve discussed so far, just send them to us in the comment section below.
Whether you’re repainting a room, painting the interior of an addition or the whole house interior for the first time, painting is a transformational experience. The question is what kind of transformation are you after?
Painting can turn the dull into the exciting.
It can also turn expectations into disaster. In this week’s solution I will give you some insight from my forty years of experience to help prevent that from happening.
Where to begin. There’s a lot of work that needs to be done before you ever start doing any physical work. Before you pick up a brush or roller you need to:
Determine the right paint. This should be determined by what the room will be used for. Is it a kitchen or a bathroom where it is likely to be splashed and splattered? Is it a kid’s room where it will have little messy hands coloring pictures on it? Is it a family/living area where most of the activities won’t involve the walls beyond their appearance? Another thing to consider is the quality of the paint. Better-quality paints have more pigment and cover better, wear better and last longer.
Latex (water base) – Dries quickly, easy clean up with water, works great on drywall.
Oil / Alkyd – Slower drying, more durable, requires mineral spirts for clean up, great for wood trim and areas that need more cleaning.
Sheen – This is the amount of reflectivity or shininess of the finish. Not that many years back you had choices of flat, satin, semi-gloss and gloss. Now depending on the manufacturer there are a lot more including pearl, matte, egg-shell, low luster, medium luster, etc.
Pick your colors. This requires an increased awareness to your surroundings. What colors you like, or don’t like? You may not even know why and that’s okay. What matters is how it makes you feel. Look at the interiors of buildings and homes, where ever you go. Look online at similar spaces to the one you’re going to be painting. Sherwin-Williams has an online service that will allow you to experiment with colors on your project before you ever put any paint on the wall.
Get sample cards and see how they look in the room. Every room has its own natural and artificial light. The color will also be affected by colors of things in the area. After narrowing the choices to a few, get small quantities of samples and paint them on the wall to see how they look. At this point the colors can be altered some to get the right color.
You also need to consider the other people who will be sharing this space. They may not like the colors you do. This may not matter to anyone but you, but if it’s important to the others their input needs to be included in making the final decision.
After
determining the right paint to use and picking your colors, you’ve completed
the first step of your interior paint project. Next week we’ll discuss the
tools you need to complete your exciting painting project.
I have been presented with another building project puzzle. What do you know, it’s from another family member and reminiscent of last week’s post. Do you think they have it in for me…or maybe they just know that I’m good at finding solutions? In reality every construction project deals with these or similar questions.
My sister Ann owns and operates Prairie Paws Lodging, a pet retreat. Her service is in such demand that she has been considering expanding. Timber Creek Construction built her existing building three years ago and we’ve been discussing options for expansion over the last year. After some consideration we’ve decided to build separate private pet cottages rather than adding on to the existing building.
Prairie Paws Lodging
A few days ago, she called and asked if I could have one of these cottages built and ready in three weeks. After a gasp, I said, let me give it some thought. At this point we haven’t determined a floor plan, dimensions, materials, construction method, etc. (Why would I agree to even consider this when I’m already so busy? Because I love finding solutions and helping people with their dreams, that’s why.) It’s not like we weren’t already working on plans to enlarge the outdoor run and converting it to a dog playground. (More on this in a future post.)
Since we talked, this project and its questions have been bouncing around in my head.
The main questions
that need answered?
What is the floor plan/design going
to be?
What is the size/dimensions?
What building materials? (it needs to
be water & dog urine resistant)
Price, what’s it going to cost?
How is it going to be heated and
cooled (a requirement by the state)
Where will it be located, in relation
to the rest of the facility? Will this have any bearing on the construction,
size, etc.?
I called Ann and asked her to send me pictures, links to websites or any other ideas that she had. I got on line and began researching different building materials that would serve our needs. And the solution building process began.
What is the floor plan/design going
to be?
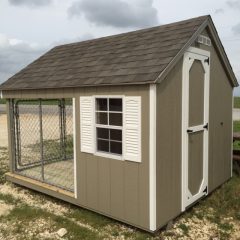
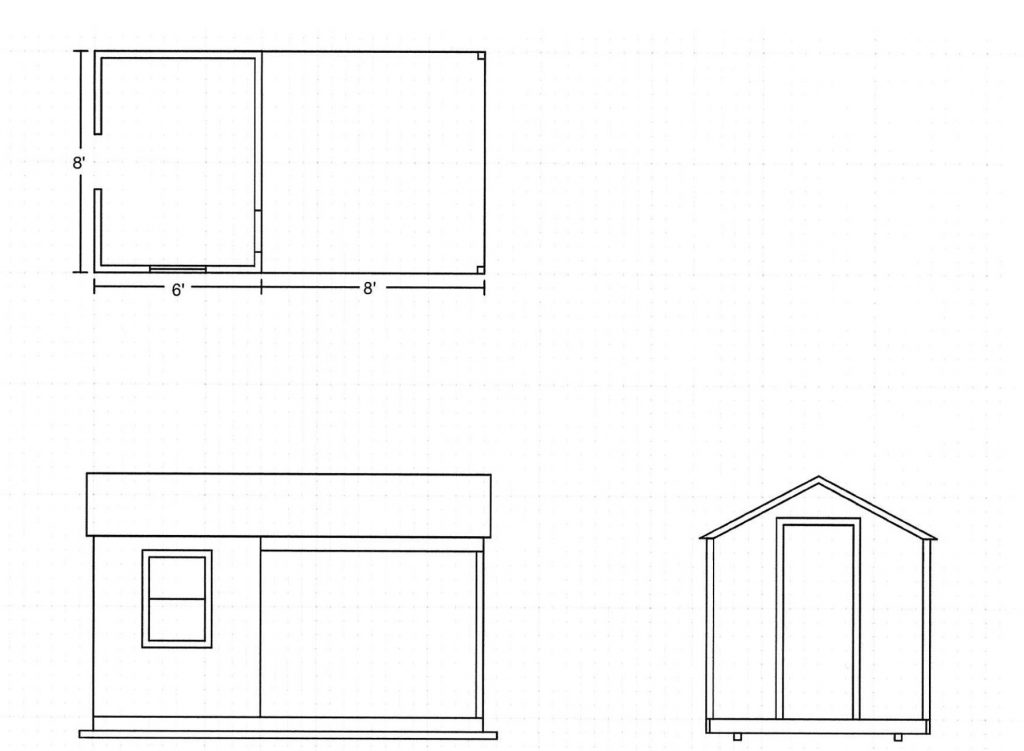
We started with a couple of design ideas that she found on web sites. This gave me a good visual idea of what she wants. The first was Dog Kennels built by Lone Star Structures. The second was EZ-Fit Dog Kennel from Pinecraft. Both of these structures are nice looking and would work great in someone’s back yard for their own pet. Not so much in an application where different dogs will be using them, and a clean environment is important. Both have exposed wood framing and would not work well for regular cleaning. Beyond that the basic design is what we’re after.
What is the size/dimensions?
These two buildings varied in their dimensions. Ann and I discussed what she needed and what size would fill those needs best. She wants these cottages to be larger than the size of her existing pens. After some discussion we decided on an 8’ x 6’ enclosed portion and an 8’ x 8’ open covered area. This was determined by a combination of things; sized to meet minimum needs and be most functional, material dimensions (least amount of waste), price (bigger costs more), appearance (needs to be well constructed and look nice).
What building materials?
This is where things begin to get more difficult, because there are a lot of options. We know wood isn’t the best choice for wet conditions. What are the options other than wood? What can we do to protect wood if it is used? One thing we are looking at is a polypropylene slat flooring made by Double L Group. We are settling on a combination of products to keep construction from becoming complicated, meet the budget and provide the look we’re after. We’ll go into more detail in a later post.
Price, what’s it going to cost?
This is always a question, as it should be. The real question that should be asked, what’s it worth? Is this expense going to generate enough revenue to be justified? If it’s more than my budget, where can we reduce the cost? We’re early enough in the process that we don’t have this question fully answered yet, but we will keep thinking outside the box to get to the budget number.
How is it going to be heated and cooled?
HVAC is typically an expensive part of construction projects. In this case though, we are dealing with a small space, less than 400 cubic feet. They make some inexpensive single room units that look like a window AC and can be mounted in a window or through the wall. In this project the through the wall application would probably be the best option. It would let us mount it higher which would get it further from the dogs.
Where will the building be located, in relation to the rest of the facility? Will this have any bearing on the construction, size, etc.?
At this point we have a pretty good idea of where it will be located. For this to be determined we will need to consider how the new building will connect with the existing pens as well as new ones? What will the daily routine be when it’s being used? If more cottages are built in the future where would they go?
This is a lot to be considered for such a small project, but for the most part the considerations are the same regardless of the size. The fact that it’s small and what it’s going to be used for, does create some special considerations.
The one thing that we haven’t discussed yet, and maybe the most important, is if I have the time needed to do this project. This question can’t be answered by anyone but me. This question is one of the hardest questions that people in the construction business ever answer. Most of the people in this business that I know want to help people build their dreams. (This is a topic for another post.)
I will finish compiling figures, working on design specifics, determining the best options for material and if I have time to get the project completed on schedule over the next few days. If we’re going to be able to do this the questions need to be answered by the first of next week.
Keep
watching for project updates in future posts.
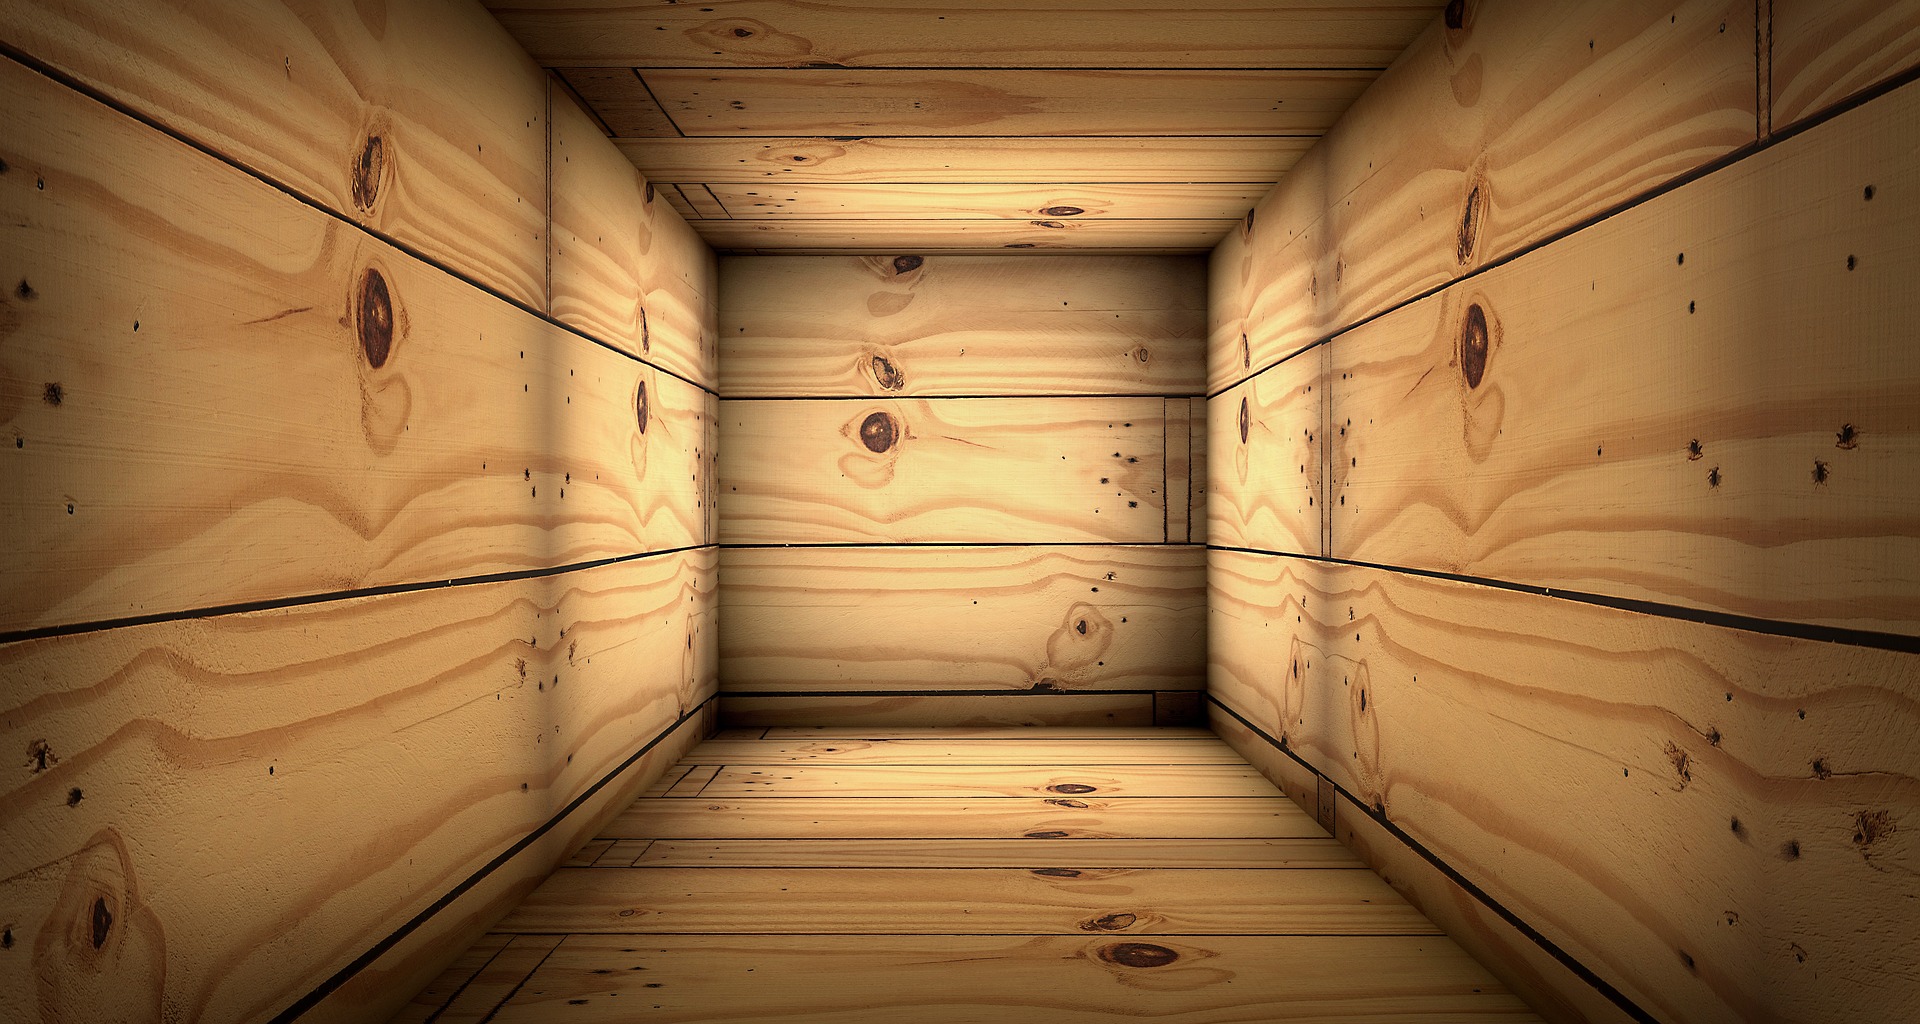
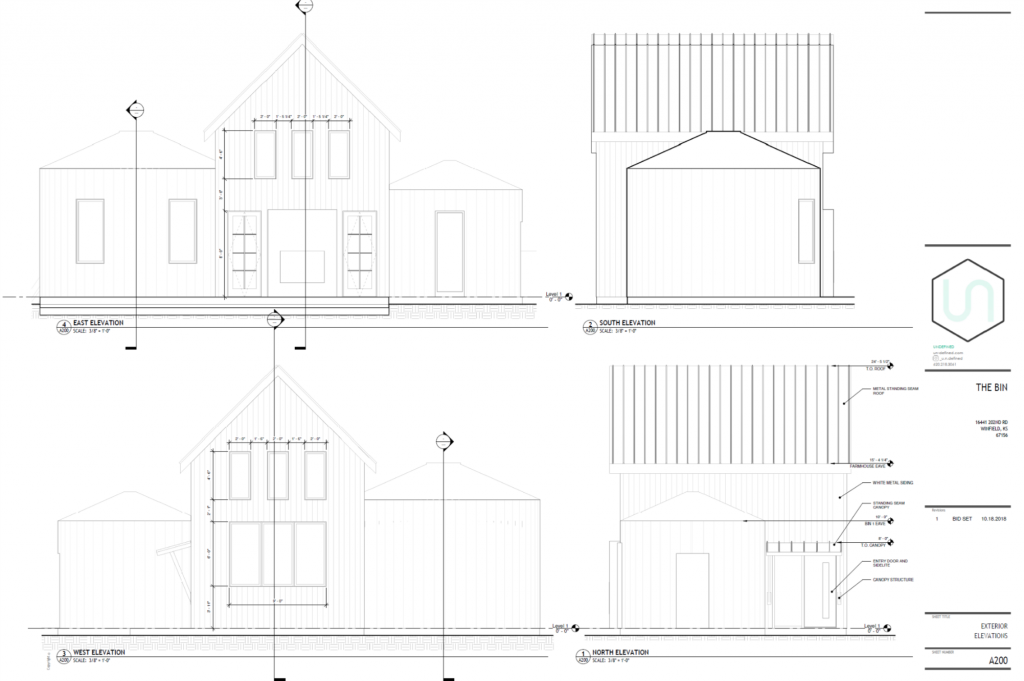
The view through a window is much better than through a solid wall. If you’re in a box without windows, it’s hard to see out. Most of the time people are looking for solutions from inside the box. Even the most basic construction project needs a clear view of where things are headed. When it’s something “Undefined” it becomes more difficult.
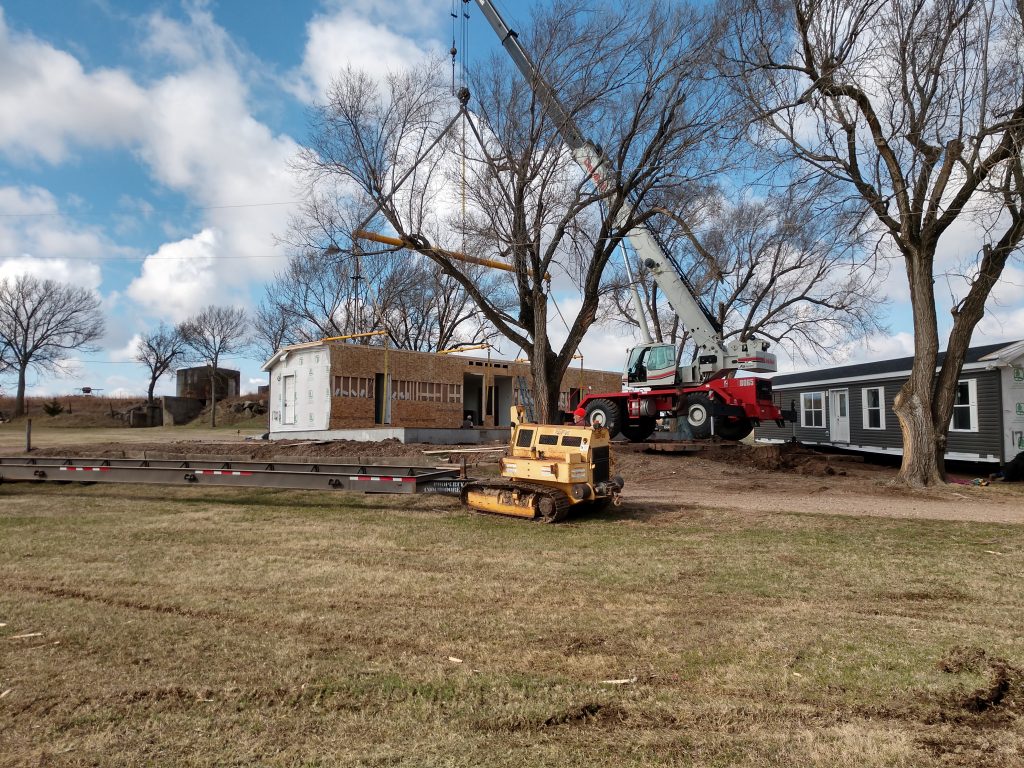
An update on Hannah’s out of the box, grain bin home project.
As I expected when Hannah went to the bank yesterday, they didn’t just hand her a blank check, imagine that. The meeting went well though and they didn’t tell her no. As always, they gave her some papers to fill out for getting her credit approved. Because the house is going to be built on property that currently belongs to her parents there needs to be a survey done for separating off a parcel. The tricky part will be the appraisal. When doing appraisals, they will compare this project to other similar ones in the area. This is often an issue even for conventional construction projects. Guess what…there aren’t very many ‘out of the box, grain bin houses’ around.
Every problem has a solution, you just have to be willing to look for it.
As Hannah was telling her mom about the meeting with the bank, she said the banker said, “You’ll need some prices from a contractor.” …she handed them the eight-page detailed proposal. Next, they said, “We’ll need drawings.” …she gave them those as well. Most building project customers never get the level of documentation that Hannah had, even after meeting with the bank, let alone before. Another out of the box solution.
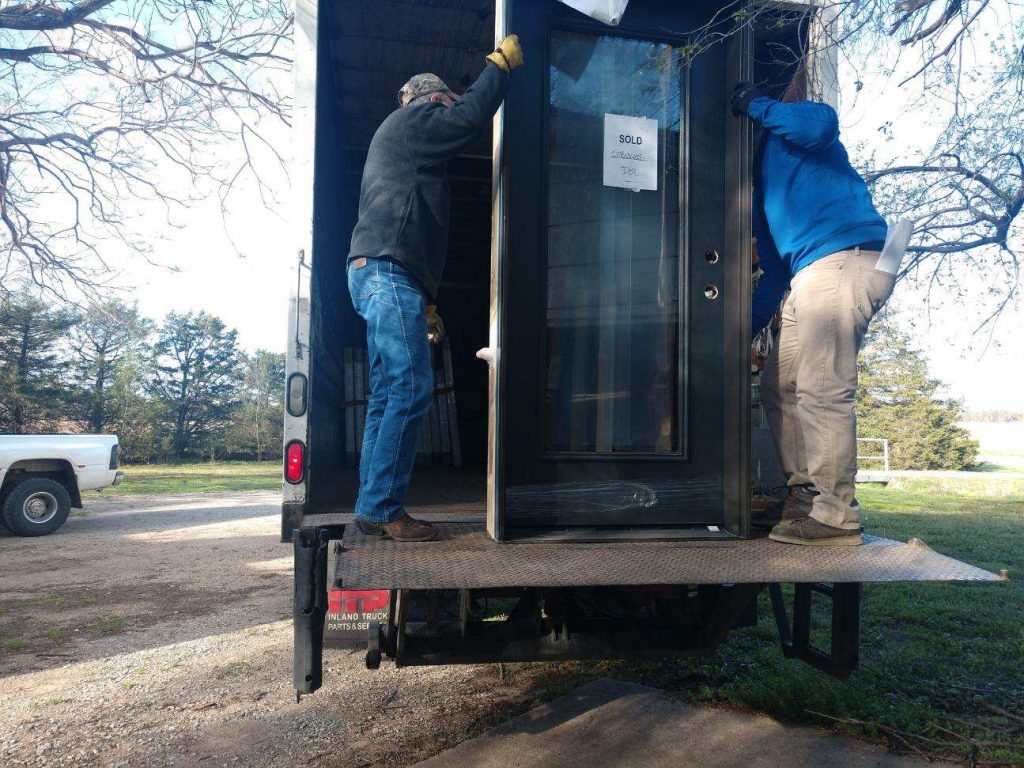
Another way windows help, is when they’re delivered. We received the windows and door that were purchased at the Pella contractor garage sale. They were unloaded in her parents’ garage until we are ready for them. We had to do some out of the box thinking to figure out what changes needed to be made to find the out of the box solutions.
Met with the bank and received windows. Two things accomplished this week that move the project forward. We are approaching the top of the mountain and it won’t be long before the momentum picks up. When that happens, we’ll be in for a fast ride down the other side.
Every nail driven, puts another board in the wall.
Don’t be
afraid to look outside of the box for solutions. If you need help with this,
let us know in the comments below.
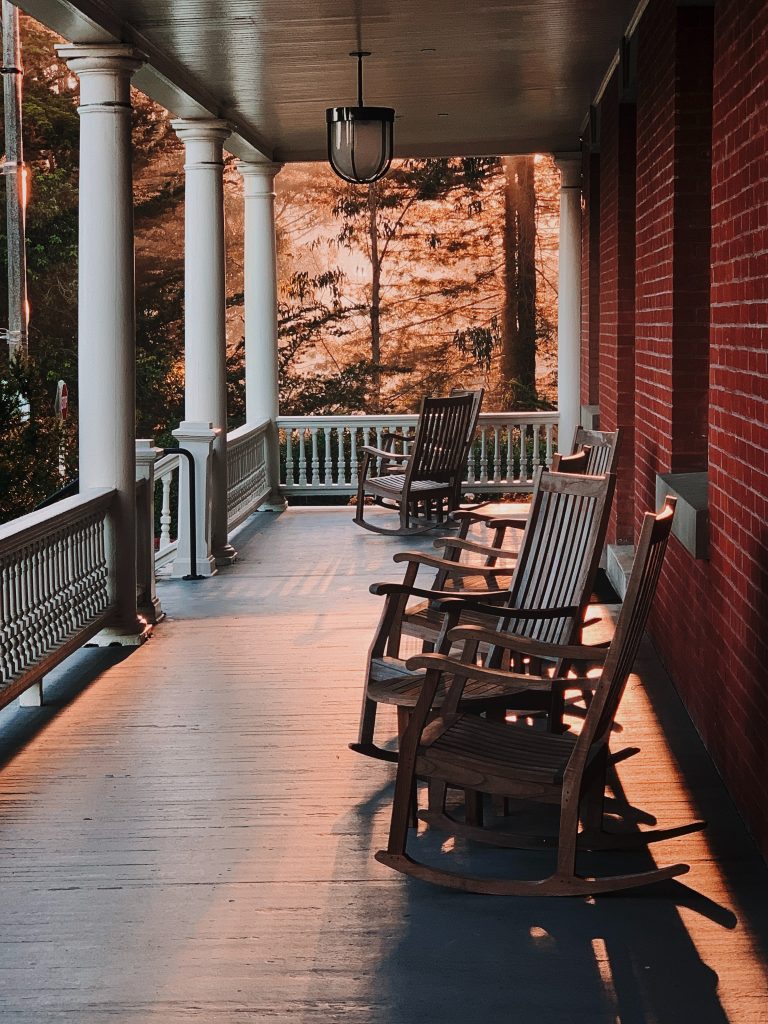
How Adding a Porch to Your Home Can Change Everything
When talking about houses one of the things that is discussed with pride or envy is a porch. Porches will make all the difference to how your home feels before ever stepping foot inside. You’ve probably heard it said that you only have one chance to make a good first impression. This is true for your home as well.
A porch done right can make a great first impression.
Timber Creek Construction is in the pre-construction stages of building a front porch on Will and Ivy Tatum’s new home. They are currently in the process of getting a home set in the country on some family property. The family connection and history lend itself to making the home special. The porch on this home will do just that.
Factory built homes have come a long way from the early days of single wide trailer houses when they weren’t much more than a camping trailer with skirting. I don’t know but having a trailer tongue sticking out on one end and a license plate on the other, just doesn’t feel very long term.
Porches vary depending on geographic location, architectural design and purpose. According to Dictionary.com, a porch is, “an exterior appendage to a building, forming a covered approach or vestibule to a doorway.”.
A porch without a roof is not a porch.
A wood structure with spaced flooring is a deck. A concrete slab without a roof is a patio. A raised uncovered concrete area at a doorway is a stoop. All of these serve a purpose, but none of them can offer what a porch can.
The roof portion is what makes all the difference. It’s the part that adds the real value.
Here are a few of the benefits to a porch:
Additional protection from the
elements (sun, wind, rain)
A protected and shaded place to enjoy
a cup of coffee, read a book, entertain guests or simply take a nap.
Protection from bugs if it is
screened
Improves appearance of the home’s
exterior
Increases the value of your home
One of the reasons decks or patios are done rather than porches is the cost. There’s no question that the addition of the roof will increase the cost substantially. Like any construction project that is undertaken, the more that is done, the more that it will cost.
The question…Is it worth it?
Watch the difference that this porch will make to Tatum’s home. Once you see the finished project, I think you and they will both agree.
It was definitely worth it.
Keep watching to see the difference a porch can make.
If you have questions about this project or others contact us in the comments section below.
The Hero and Her Guide Are Defeating the Evil Budget Monster
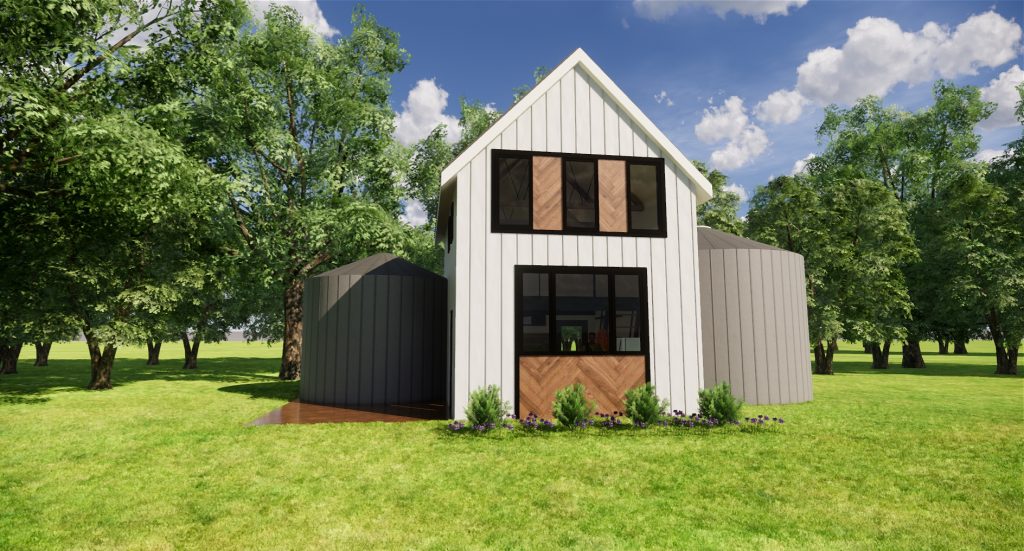
As the voyage continues, Hannah and Mark trek forward on their journey toward the allusive ‘Grain-Bin Home’. An expedition like this is not for the faint of heart. It requires the passionate desire of a hero and the experience and knowledge of a trusted guide.
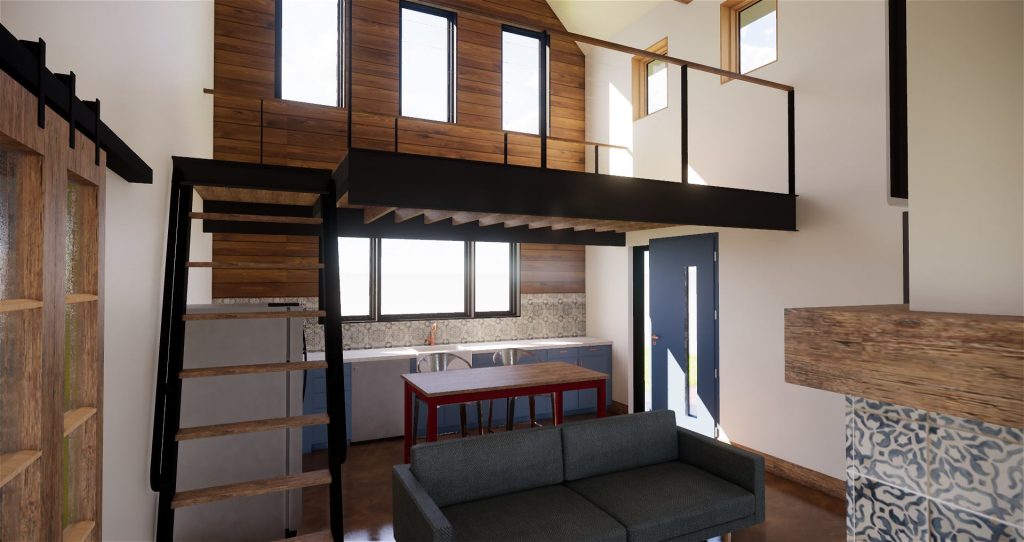
This story began a year ago with the idea of building a small home by repurposing a couple of used grain bins. The two steel bins would be connected by framed wood construction. This idea was dreamt about, discussed, thought about, revised, discussed some more and over the next several months, the preliminary plan emerged.
The collaboration of the hero and the guide in developing a plan before starting on an adventure like this is critically important to achieving a positive outcome. This planning stage is often as long or longer than the building portion. Turning a dream into a reality is the hardest part of the quest. It’s also the most exciting. It is the part where the imagining turns into the doing.
As we worked on these revisions, Hannah on the drawing and me on the proposal we were presented with some benefits of having an experience guide and the connections that come with them.
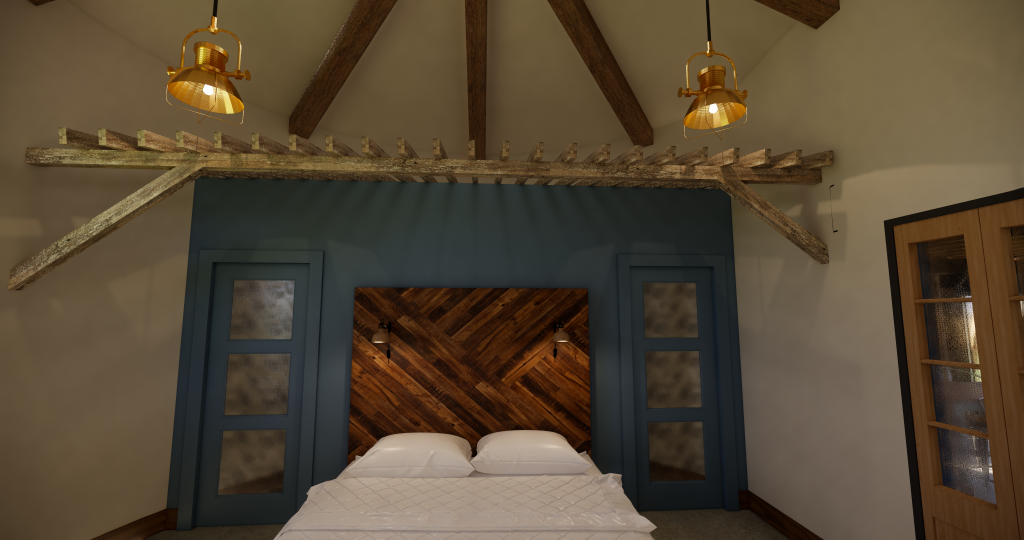
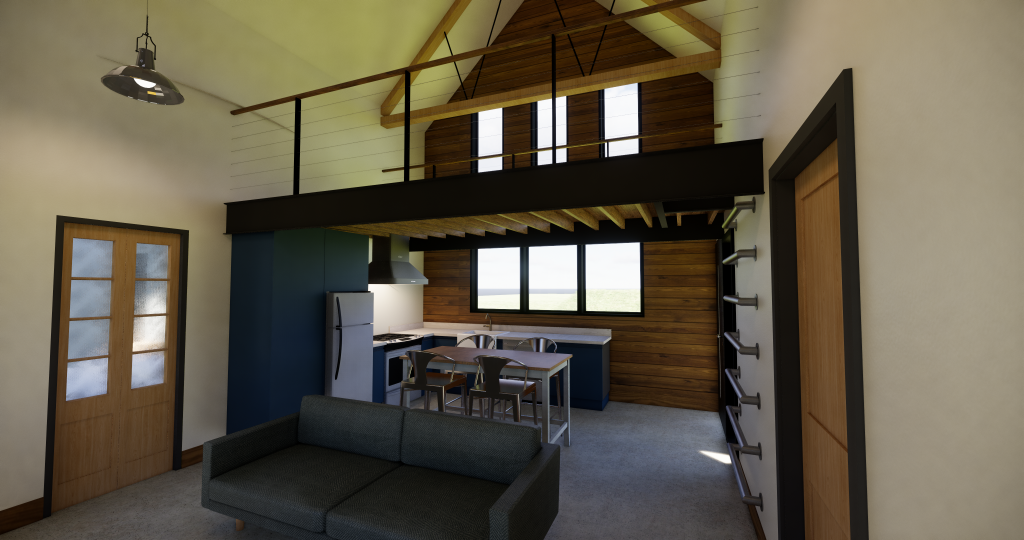
First, I became aware of some tongue and grove V-jointed 1×6 pine that a painter had, which had been stained the wrong color for one of his projects. There was enough of it to do the interior wall that we are planning to put stained wood on. It was offered to us at the cost of the wood…we bought it.
Next, I received a communication from my Pella representatives, that Pella Products of Kansas was going to have a “Contractor Garage Sale”. This was to reduce the number of unclaimed, mis-ordered or slightly damaged items taking up space in their warehouse. Hannah and I went to this sale. With some ‘on the spot’ creative solutions we made some idea adjustments and were able to get all the windows and one of the doors needed. This was a price reduction for the customer of over $23,000 from the original proposal. We will spend a portion of that savings on painting the windows so they will all be the same color.
We are on the cusp of transitioning to the doing.
Hannah is finalizing the design changes created by the earlier price reduction list and the windows and door that were purchased. At the same time, I’m finalizing the figures as per those things as well. In the next few weeks Hannah will securing the money needed, and we will be starting on this adventure.
Keep watching for the next chapter in “Saga of the Grain-Bin Home” and share it with others you think might enjoy this story.
The last two Weekly Solutions have been about the missing pieces of the etiquette puzzle, mostly from a business perspective. Today we are going to look at the customer’s responsibility in this.
The customer’s piece isn’t much different from that of the contractor’s.
Customer etiquette to the contractor:
Clear vision of the finished project –
Know what you want. This is less about the specifics and more about what you hope to accomplish with the project. A good contractor will guide you through the process of turning your dream into a reality, but you need to know what that dream is.
Clear communication –
All good relationships require input from everyone. This starts with clear communication. Be as clear as possible when you share your vision with your contractor. Find pictures of ideas, designs, finishes, color, etc. that you like and share them with your contractor.
Ask questions –
If you don’t understand something about the project, ask. This is part of the communication process. Contractors aren’t mind readers. Because they do this work daily, they forget that the customer doesn’t. This can lead to unspoken assumptions by both parties.
Share any specific requests –
If there are things that the contractor needs to be aware of while working on your project, i.e. parking, doors to use, thermostat settings, pet arrangements, etc. let your contractor know.
Have the job site ready for work to begin –
Unless the agreement with your contractor includes moving furniture, decorations, etc. you should have this done before the crews show up to start work.
Treat the contractor the way you want to be treated –
Just because you hired your contractor to do the work doesn’t mean they are machines or slaves. They are people just like you. Treat them with the respect that they deserve.
Inform your neighbors of what is being done and when. Give them a week’s notice (which is realistic since construction schedules are often hard to nail down) in the form of a letter or informing them in person.
Let them know what portion of the property/house is having work done so the neighbors can prepare themselves. They might need to move their outdoor furniture because of traveling sawdust or can’t leave their pets outside with the loud noise from the equipment.
Reassure them their parking spots won’t be blocked if possible and their landscaping won’t be trampled. It’s also a good idea to suggest they park their cars in their garage in case debris flies around.
Offer to give them a tour when the construction is completed. Everyone loves a good before/after reveal!
I’d never thought about this. It makes sense, this is the way that I would like to be treated if I were your neighbor.
As a contractor I hadn’t thought much about the customer’s responsibility in this. I have always approached etiquette as it being my duty. It makes sense that we each approach things from our own point of view. Problems arise when we forget to consider other’s ideas, wishes and dreams.
It doesn’t matter if you’re dreaming about building a new home, a successful business or a great life, you have to choose to make them a reality. The importance of intentionality to dreams is critical to the outcome.
This week I’ve been working on finalizing the proposal for my niece Hannah’s out of the box home. This is the dream house that is going to be built using salvaged grain bins and some conventional construction. We began discussing this project a year ago. Some will think that’s taking too long. It’s important to realize that dreams don’t magically become a reality overnight. Dream building is a process that requires time.
There are 5 things needed when choosing to turn a dream into a reality:
1st you need to realize that it’s your responsibility.You’re responsible for your dreams becoming a reality. This doesn’t mean that crazy unrealistic dreams will happen (see needs 2 and 3). On the other hand too often we let our own limiting beliefs keep our dreams from becoming a reality. You are the only one who can control your own thoughts. Our thinking dictates our decisions and we are where we are because of those decisions…good or bad.
2nd you need clarity of purpose. I believe our dreams are one of the ways God tells us what His plans are for our lives. If we believe what it says in Jeremiah 29:11, “I have good plans for you, not plans to hurt you. I will give you hope and a good future.” If our dreams are in alignment with God’s plans, then there is no reason they shouldn’t become a reality. God will move mountains to make our dreams real. It’s up to us to be ready to move ourselves.
4th you need to act. A dream won’t just build itself, it requires action. This is one of the scariest things about turning dreams into reality. People generally approach action in one of two ways. Either they jump right in without thinking or they don’t do anything while over thinking it. Experienced guidance can help balance these opposing positions and help you to move forward with your dream while minimizing disasters. When faced with doing nothing or doing something you better choose to act if you ever want your dream to become a reality.
5th you need to persist. I think this is the most important one. If you ever hope to get your dream built you will need persistence. There will be disappointments that will cause you to want to quit. There will be times when you are so tired you don’t think you can do one more thing. You can begin to convince yourself that it wasn’t real…it was just a dream. This is the point where most dreams die. Somehow successful people continue moving forward when others quit. Sometimes God see’s fit to give us a wakeup call.
As Hannah and I work together to build this project it will be the building of two dreams, both hers and mine. We will each take RESPONSIBILITY for our part. We will continue sorting things out and finding the CLARITY for the dream. We will accept and give GUIDANCE when and where needed. We will intentionally ACT to keep moving closer to the completion of those dreams. Above all we choose to PERSIST and never quit until our dreams become reality.
If
you or someone you know needs help finding solutions for building dreams,
contact us in the comment section below.
Manage Cookie Consent
To provide the best experiences, we use technologies like cookies to store and/or access device information. Consenting to these technologies will allow us to process data such as browsing behavior or unique IDs on this site. Not consenting or withdrawing consent, may adversely affect certain features and functions.
Functional
Always active
The technical storage or access is strictly necessary for the legitimate purpose of enabling the use of a specific service explicitly requested by the subscriber or user, or for the sole purpose of carrying out the transmission of a communication over an electronic communications network.
Preferences
The technical storage or access is necessary for the legitimate purpose of storing preferences that are not requested by the subscriber or user.
Statistics
The technical storage or access that is used exclusively for statistical purposes.The technical storage or access that is used exclusively for anonymous statistical purposes. Without a subpoena, voluntary compliance on the part of your Internet Service Provider, or additional records from a third party, information stored or retrieved for this purpose alone cannot usually be used to identify you.
Marketing
The technical storage or access is required to create user profiles to send advertising, or to track the user on a website or across several websites for similar marketing purposes.


 With everything else going on in life, how can we remember one more thing? We don’t have to if we have a scheduled plan. First you need to decide if home maintenance is important enough for you to bother with. If it doesn’t bother you when you’re forced to deal with a big problem, then don’t worry about it. You’ll know the sump pump has quit working when you replace the carpet, baseboard and lower portion of the sheetrock in your basement.