What Are the Best Construction Questions?

Neon question mark written in the dark


The Ones That Are Actually Asked


Last week I shared the list of questions asked by a group of Scouts. This week I’ll begin to answer them.


As I pointed out last week, due to the number of questions I’m going to divide them into different topics to keep the posts from getting too long. This week I’ll start by answering some basic construction questions. Keep in mind that asking and answering questions is communication and communication is a two-way process. This means that before I can answer questions fully and accurately, I need some questions answered.


How much does building a new house cost?


This is the most common first question. It only makes sense; cost is a critical part of deciding whether to build. It’s also one of the most difficult to answer, especially when asked without any specifics.


Here are some of the questions that need answered to determine a price:

  • Where will it be located? – location effects things like utilities, sewer, lot preparation, zoning, permitting, etc.
  • How big? – more square feet costs more.
  • How many levels? – stacked is typically less expensive per square foot.
  • Type of foundation? – slab, crawl space or basement.
  • How high are the ceilings? – higher is more expensive.
  • What style of roof? – more complicated costs more.
  • How many windows? – more windows cost more.
  • Quality of materials and finishes? – there’s a wide variation in quality which translates into a wide variety of price, i.e. cabinets, countertops, flooring, light fixtures, plumbing fixtures, etc.


This is some of the things that need to be determined before getting an accurate price.


As a vague answer to a vague question, in the middle part of the US where we do construction, you can figure an average home to cost $110.00 to $150.00 per square foot of living space.


How long does it take to build a new house?


The answer to this question will be directly connected to the answers of the last question. Size, design, level of finish, etc. will all effect the length of time to build a new house. An average 2000 square foot home will take 6 – 9 months.


How much wood does a new house take?


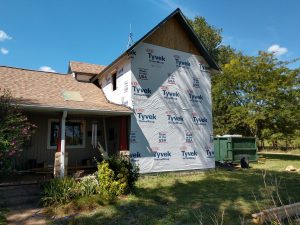
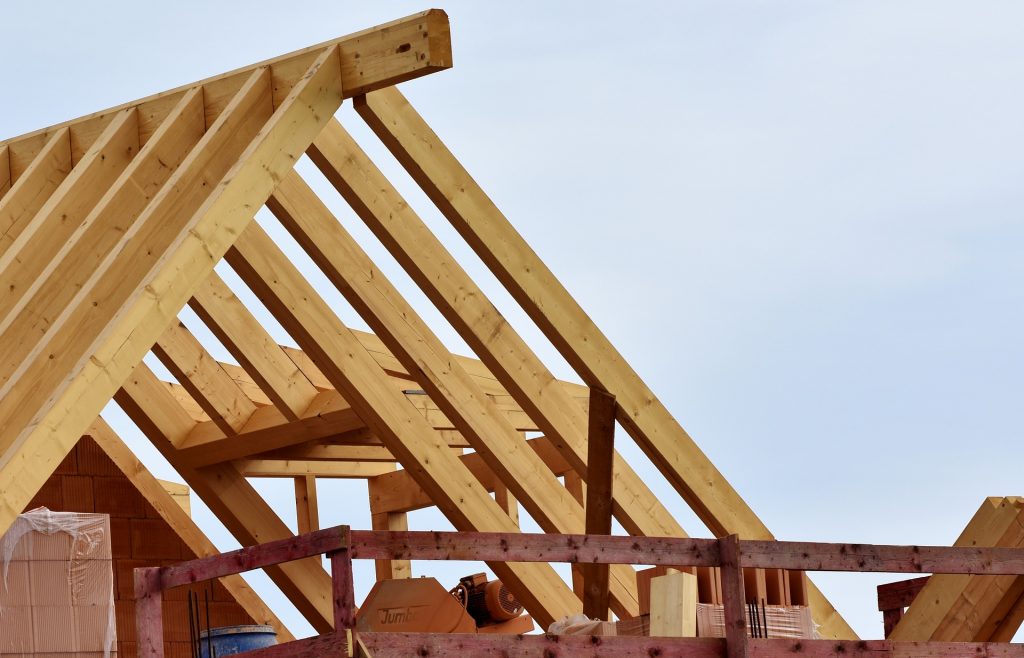
Once again, the answer is going to depend on specifics of the house. Let’s just answer the question using the average 2000 square foot house that we have been using. Let’s assume that it’s going to have wood floor joists, sub-floor, wall studs, wall boxing, ceiling joists, rafters, roof sheathing, siding, windows, doors, cabinets, etc. All these things combined will be around 40 pounds per square foot. That means the wood used in a 2000 square foot house will weigh around 80,000 pounds, or 40 tons.


How much steel goes into a house?


There are some cases where houses are framed using steel, but typically that’s not very common. There are some steel things commonly used, like nails, screws, joist hangers, reinforcing steel in concrete, etc. Sometimes steel beams and posts are used for supporting heavier loads and wider spans. In a typical wood framed house, it takes around 10 pounds of steel reinforcing, fasteners and misc. per square foot to build. This means that our 2000 square foot wood framed home would have around 20,000 pounds or 10 tons.


Next week we’ll answer questions about the construction process. If you have any construction questions you would like answered, asked them in the comments below.


Lack of Quality, Honesty and Integrity


The Remainder of the Construction Complaint List


This is the fourth and final post in this series of building solutions on how to avoid construction project nightmares. Previously I wrote about the most common reasons construction projects fall apart. The next two posts dealt with the high cost of poor communication and what contractor communication should include. This week we’ll focus on the character portion of the list.


We’ve all have had experiences where things didn’t turn out like we had envisioned. This is true in everything, especially construction. Lower standards have become accepted and normal.


The low bar of expectation has become the construction industry standard.


I believe this to be attributed mainly to the focus on price. We should be conscious of what things cost, but when it is the determining factor above everything else, something will give. Most likely that will be quality and service.


The second factor is that we’ve become a fast-paced drive-through people. We expect everything to be instantaneous. The cost for this lightning fast speed is the same as price…quality and service.


Raising the bar is simple really.


It starts with an awareness of how low the bar is. It has been moving down in small increments for years. It’s happened so slowly that most don’t even realize how low it is. Raising it up will be a slow process as well.


The remainder of the list of reasons construction projects fall apart is as follows:


  • Poor quality
  • Cluttered and unorganized job site
  • Left hanging part way through an unfinished project
  • Lack of scheduling or poor time management


Quality, honesty and integrity cover this part of the list. These are character issues. They are about choosing to give as much importance to someone else’s needs as I do my own.


Quality – is the degree to which something is produced correctly. It can be somewhat subjective, but the higher the bar is raised, the higher the quality standard becomes.


Honesty – is moral character that is trustworthy, loyal, fair and sincere. It is absent of lying, cheating and stealing. Thomas Jefferson is attributed with having said, “Honesty is the first chapter in the book of wisdom.”


Integrity – is adherence to strong moral and ethical principles and values. One has integrity to the extent that they act according to the values, beliefs and principles they claim to hold.


Poor quality and a disorganized job site are part of the physical construction skill set. These things are skills that should be taught through apprenticeship and mentoring.


The same is true for lack of scheduling and poor time management. These things can be taught. Learning and applying these skills is more difficult, in that they are more directly connected to specific personality traits.


Leaving a job hanging partially finished, however is strictly a moral issue and unacceptable, short of some life altering emergency.


The entire issue of construction projects falling apart is unnecessary and unacceptable.


It doesn’t have to be this way!


You can choose what you want, it’s up to you. Learn more, expect more. Raise the bar as high as you can reach.

What Should Be Included in A Contractor’s Communication


The Nuts and Bolts of a Construction Agreement


The last two weeks I wrote about how to prevent your construction project from falling apart and the high cost of no communication


In the first post I focused on –

  • The fact that bad construction experiences are way too common
  • The most frequent reasons that it happens
  • The number one reason it does


Last week’s emphasis was on –

  • The high cost of this bad communication
  • Reasons communication is avoided
  • The results that can be expected when it doesn’t


What can you, as the customer, do to avoid having a bad construction experience?


It’s not as difficult as it initially appears. It will require some time, effort and education. Reading this week’s solution is a good start.


Communication needs to be thorough and understandable. If it’s not, then it really isn’t communication. When considering a construction project, it is even more important because you have a lot at stake, i.e. time, money, finished project, etc.


Before you start your project, you should expect a written proposal. This proposal should include:

  • Information pertaining to customer and job – Customer’s name, project address, what the job is, who the proposal is going to.
  • What is going to be provided by the contractor – Labor, services, material, equipment, etc.

  • Scope of work – A written-out description of what the project is going to include, specific work to be done, dimensions, materials to be used, etc.
  • Price – Amount for each specific element of the project in addition to a total for the complete project.

  • Payment arrangement – When the payments will be made (at specific time intervals or at completion of specific portions of the project).
  • Project duration – The amount of time the project will take to do after starting.


Now you have the important pieces you need to make an informed decision about your project. You should be able to determine if you and your contractor are in agreement about what the project includes, the price to have it done and how long it will take. One piece of information that is still missing, is when will the project get started. This information will come in a contract after the proposal has been signed.


If your contractor is qualified to do your project, they should be busy doing other construction projects as well as preparing other proposals. This means they can’t realistically schedule your project until the proposal has been signed.


Then they can follow up the signed proposal with a contract. This contract should include:

  • Information pertaining to customer and job – Same as on the proposal including any additional pertinent legal information needed.
  • Reference to any additional documents – This could be drawings, specific information about materials used, requirements of the governing body, etc.
  • Construction funding – Pertinent banking information if money is being borrowed.
  • Property specifics – Location of boundaries and/or need for surveying.
  • Start time – The time for the project to be started and the duration.
  • Terms and conditions – More in-depth explanation of project specifications, expectations, requirements and permissions.


This amount of communication can lead to information overload, but don’t let it. If you don’t understand something, ask your contractor. If they’re unwilling or unable to satisfactorily explain it to you, this may be another indication that they aren’t the right fit for you.


This construction project is your dream don’t let it turn into a nightmare.


I’ve spent a lot of time on the communication reason construction projects fall apart. Next week we’ll look at the second half of the list.

  • Poor quality
  • Cluttered and unorganized job site
  • Left hanging part way through an unfinished project
  • Lack of scheduling or poor time management


Share your construction nightmares in the comments below.

There Is A High Cost to No Communication


The Best Way to Avoid This Is to Communicate


You probably guessed it already, this week’s topic is COMMUNICATION and the all too common lack of it. Because communication is such a big issue, I’ve written about more than any topic, including last week. In that post I wrote about the major reasons construction projects fall apart. Half of them are communication related.


This week we’ll look at those reasons, results and remedies for…


• Misunderstandings due to poor or no communication
• Being blindsided by cost overruns or hidden costs
• Completed projects not being what you wanted or expected
• Not understanding construction terminology


What is communication?


According to the Cambridge Dictionary, communication is:
…the exchange of information and the expression of feeling that can result in understanding


We all have our own perceptions and understanding of words, phrases and gestures. I presume I know what you mean, and you do the same thing. This happens with spouses, family and close friends, people we know as well as anyone. If it happens in these relationships, it only makes sense that it will be more likely with strangers.


Reasons people don’t communicate:


  • Takes time – People now expect things instantaneously. We have high speed internet at the tips of our fingers. Photos are developed the moment they’re taken and can be printed instantly via a wireless connection to a printer. We don’t have time to read through a multi-page document explaining our construction project.


  • Overwhelming – Reading through pages and pages of descriptions and explanations of construction legalese is a daunting task. Probably won’t understand half of it. It’ll be easier to just go ahead and start. We’ll figure out the details as we go. I know what I want and I’m sure the contractor does too…NOT!


  • Lost skill – Communication is a two-way process. It requires both giving and receiving, speaking and hearing, writing and reading, expressing and understanding. If we don’t know how to use these skills, we can’t communicate effectively. Good communication requires more than emojis and hashtags.


  • Don’t like conflict – Most people don’t like conflict, but it can be positive. Conflict is always difficult but can lead to growth and change. It indicates commitment and can lead to better outcomes. It allows us to see the other side’s position. We should be willing to discuss disagreements without our feelings being hurt.


Results of poor communication:


  • Project wasn’t what you expected – You have a vision of how your finished project is going to look. You can see it in your mind. When you come home one evening, excited to see what has been done and then…it doesn’t look anything like the picture in your mind. What happened?


  • Cost overruns – You’ve saved and/or borrowed the money you predict you’ll need to do the upcoming construction project. You get an estimate of what it’s going to cost. Sure, it’s more than you expected, but that’s alright it will be worth it in the end, right. Then you get the final bill and it’s a lot more than expected. Now what? Where are you going to find the additional money?


  • Time overruns – The contractor says; “Your project will be done in no time.” “This won’t take too long.” “We’ll be finished by the end of the month.” “This project will only take a few weeks.” This sounds great, but how long is too long, by the end of which month, how many weeks is a few? Trust me, your contractor’s ideas and yours are different.


  • Not knowing what’s going on – As you’re talking with your contractor, he’s telling you how this thingamajig is going to support that doohickey. We use the newest and best gadget to build our gizmos. All the while you are nodding your head as if you know exactly what he’s talking about. When, in reality, you have no clue. Wouldn’t it be worth it to ask some questions?


Poor communication can be solved with more time and intentional effort.


Come back next week to discover the remedy for this communication problem by learning what should be included in builder communication.

How To Prevent Your Construction Project From Falling Apart


Emphasis on, “The Project”, Not the Construction


You or someone you know has had a construction project, ‘not go as planned’.


To get it back on track may have just required a little clarification or…it may have ended up in court. Clarity of the project up front is the most important and most overlooked part.


I’ve heard people say the worst experience of their life was a construction project gone bad. It doesn’t have to be this way!


This problem can, and should, be addressed before any actual construction begins. The underlying issue with any disagreement is, different people seeing things differently. A good contractor’s job is to sort through these differences and develop a clear picture of the project scope, design, schedule and price.


Most construction projects fall apart for one of these reasons:


• Misunderstandings due to poor or no communication
• Blindsided by cost overruns or hidden costs
• Completed project wasn’t what you wanted or expected
• Not understanding construction terminology
• Poor quality
• Cluttered and unorganized job site
• Left hanging part way through an unfinished project
• Lack of scheduling or poor time management


The number one foundational problem between customer and contractor is –


LACK OF or POOR COMMUNICATION.


The first four…half of the list, are communication related. Good communication takes time and effort. Time and effort translate into additional cost. Additional cost means your project’s price is higher. Price is important and often leads to choosing a lower bid. Full circle back to the importance of communication. If you are aware of the differences and are presented a clear plan, you can make the best decision for you and your project.


The next two on the list have to do with trade skills and a LACK of QUALITY WORKMANSHIP. The level of craftmanship expected has been decreasing for years. I believe this is the result of importance placed on price rather than quality.


The last two focus on the LACK of HONESTY AND INTEGRITY. This is another place where the bar has been lowered and needs to be raised back up. Contractors need to say what they do and do what they say.


This entire list of issues can be remedied with attention given to these three overarching areas –


Better Communication
Quality Workmanship
Honesty & Integrity


Next week’s solution will focus on the number one reason construction projects fall apart – LACK OF or POOR COMMUNICATION. We will look at things you should know and expect from your contractor before any construction begins and throughout the project


Share your worst construction experiences in the comments below.

An Update on The Lavallee Remodeling Project


A Good Example of How to Hit A Moving Target


A few weeks ago, I wrote about the challenges of remodeling and how they pertained to the Lavallee project. I pointed out that these challenges start before construction and continue throughout the project. These moving targets are part of remodeling.


Hitting a moving target requires the ability to look ahead and visualize where it’s going.


One of the project goals was increased head room at the top of the stairs on the second floor. The top of the stairs ended in a low vaulted ceiling attic room with a small raised dormer for head room. This area was cramped and dark. It didn’t provide a very usable space.


The increased head room was the initial focus. We also planned to remove a dividing wall doubling the square footage of the space. It was still going to have limited head room at the sides of the room but would provide the head room needed to access the second floor and would make a great play area for kids.


The original plan was to install some beams to allow for raising the center portion of the roof and ceiling. As the project progressed, we began seeing another option to gain more usable space by adding to the existing short walls. This option would open the area up more and make it more usable. It would also allow enough wall height for installing two 25” x 25” windows above the porch roof giving the area some great natural light.


Once the walls were built level it was apparent the floor was not. It was decided to remove the floor from the stairway landing and level it up as well as eliminate the existing broken floor joists. When the original painted tongue and groove wood floor was uncovered it was determined that it should be salvaged and used. At this point we don’t know where yet, but we’ll find the right place.


After seeing the open framed ceiling with a few temporary ceiling joists, the customer asked about leaving it vaulted. After some discussion, we decided to leave it vaulted with a narrow flat ceiling near the ridge and install some beams rather than ceiling joists.


As you can see the targets keep moving and we have the stairway landing one in our sight.


The floor height in the stairway landing area was fifteen inches lower than the height of the second floor. To accommodate this height difference there was a step at the top of the stairway turned 90 degrees. This is not a good design and is not going to work. We are currently planning to cut a step back into the second floor rather than how it is currently.


At our weekly production meeting with the customers earlier this week we discussed the stairway plans. As we talked there were some new and different options that began to surface.


I’ve been thinking about some ideas for this stairway since the meeting and have come up with different options. I think this target is on the move and we better get it in our sights.


Check back later to see what direction the stairway goes and how it turns out.

I Love the Challenge of a Good Remodeling Project


If It Was Easy, Anybody Could Do It


The challenge of a remodeling project is taking an existing building and turning it into something new while working within the buildings predetermined parameters. Otherwise just tear it down and start over.


The remodeling challenge isn’t for everybody.


Building new is simpler, it’s a less restrictive clean slate that requires less imagination. Where’s the fun in that?


On the other hand, new can be more cost effective than remodeling. This is one of the questions that needs answered early on. If remodeling is the decided-on plan, just be ready for the challenges.


The Lavallee remodeling project certainly fits the status of challenging.


This project starts with a home that was built in the late 1800s. It has previously gone through numerous remodels and additions. The amount of previous changes makes this project that much more challenging.


The project’s goals:


  • Increase the size of the master bedroom, add a new master bath and walk in closet.
  • Add a bathroom to the second floor.
  • Widen the narrow stairway to the second floor.
  • Increase headroom at the top of the stairs on the second floor.
  • Open wall between the kitchen and the dining room.
  • Lower the dining room floor height to match the kitchen.
  • Install new windows.
  • Change the exterior of the remodeled part to a low maintenance exterior finished insulation system (EFIS) system.


The challenges start even before the construction does:


  • Is remodeling the best option?
  • What is the project budget?
  • What is the project timeline?
  • Without a blueprint what will the floor plan be?
  • Where do the customer’s plan to live while the work is being done?


As this project gets underway there have been new challenges that have come up. They are hidden inside, behind or under something. Until things are opened up you won’t know what they are. As they do, we address them, find a solution and move forward.


A few of the challenges we’re dealt with while digging for the addition foundation:


  • Temporarily disconnecting and moving the air conditioning ductwork so the digging could happen.
  • Discovering a buried gas line, determining it was not in use and cutting it out of the way.
  • Finding some unused foundation pilings and determining a plan for dealing with them…final plan yet to be determined.
  • Reconnecting the ductwork so the customer has air conditioning in this upper 90-degree heat.


I will post more updates to this project as they happen. Check back regularly and watch as this phoenix rises from the ashes.

A Day by Day Accounting of The Dog Playground Project


And What a Fun and Challenging Project It Was


We all expect things to take less time than they usually do. It’s no different when building an “out of the box” project like a dog playground.


Last week I wrote about the expansion and updating of Prairie Paws Lodging’s facility and what the project consisted of. This week we will review the daily accomplishments and struggles.


Preconstruction activities – Before onsite work could go too far, we needed to finalize what materials/processes would be used for the out of the ordinary construction. Some of this was addressed in last week’s solution


One challenge that we didn’t talk about was the need for 50-60 railroad ties. Our supplier wasn’t sure he had that many and couldn’t get more for a couple of weeks. I made a couple of calls and found more if we needed them.


With all the wet weather we’ve had, my go to trucking companies were behind schedule. This presented another major challenge, if we couldn’t get the sand and gravel we needed we weren’t going to accomplish much. Once again having the right connections we were put in contact with Dave Williams of D&Ts Hauling & Excavating, Dave came to the rescue and got us what we needed before we needed it.


Day 1 Monday – We began the day by gathering the first load of railroad ties and skid loader and got them to the job site. We disconnected and removed the portions of the existing fencing that would be relocated. Next we moved the existing pipe framed structure that served as a covered area for the existing run, this was also going to be reused.


The layout of the railroad ties was measured and marked. We placed the first few ties and filled between them with 4”-5” of fill sand and then 2”-3” of ¾” gravel flush with the top of the ties. This brought us out 8’-10’ along the 48’ long east side of the run.


Day 2 Tuesday – We started by picking up the concrete culvert and delivering it to the site. Then we picked up where we left off and laid a couple rows of ties west to approximately where they were going to stop. We filled between them with the sand and gravel as before. Then we moved a roll of artificial turf to the raised pad where the building was going to sit and rolled it out.


Day 3 Wednesday – It rained overnight and made things too muddy for onsite work so, I took used the time for organizing and planning.


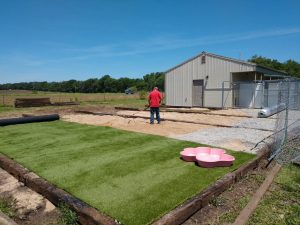
Day 4 Thursday – We laid rest of the east-west rows of ties, spread more fill and moved the remaining rolls of turf to the areas where the pad was prepped. I began digging the hole in the sand and gravel for the paw shaped pool to set in. To minimize future settling and give us the best base we began compacting with a vibrating compactor. This meant we needed to temporarily roll the first turf back out of the way of the compactor. It wasn’t fastened yet, so this wasn’t much of an issue.


Day 5 Friday – We picked up another load of ties first thing today. Then it was more ties, more sand, more gravel, more compacting, and more turf. We cut the ends of the concrete culvert smooth and set it in place. Today we got the first roll of turf lined up, squared up and stapled in place. We knew we were going to be short of sand. I called Dave and he wasn’t going to be able to get any today.


Day 6 Saturday – Dave called me and said he could get me the sand I needed. Thanks again Dave. We began by picking up 35 bags of Quikrete to use for building and shaping the hill. The first thing we did on site was move the building back into place. This was done by temporarily fastening some 2x6s to the ties over the turf to serve as skids, this went well. After it was in place, we pulled the temporary skids and bolted it down to the ties. We spent a big portion of the day designing and building ends for the tunnel/hill out of treated 2×6 tongue and groove. After they were built, we began stacking Quikcrete bags and filling around them with sand and gravel. We ran a few bags short of being able to finish the hill.


Day 7 Sunday – No work today, it’s the Lord’s.


Day 8 Monday – It’s getting closer, but still much to do. More ties, more sand, more gravel, more compacting. We finished the hill with the extra bags of Quikrete, sand and gravel. The west side got an additional row of cross ties for future pens to sit on. We rolled out the turf to go over the hill and cut it as needed. Then we rolled out the last roll of turf and cut it around the building offset, remaining gate post and pool. All the turf seams were taped, and the perimeters were stapled down with a few exceptions in areas that needed some special attention.


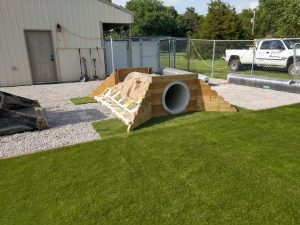
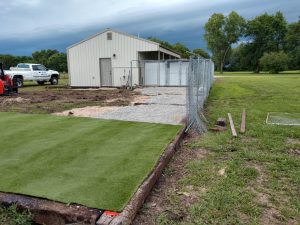
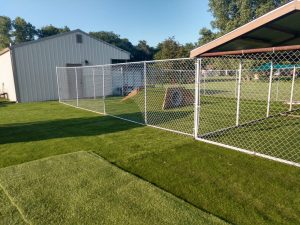
Day 9 Tuesday – Things are coming together. We reset the chain link fence in the new location, reattached the remaining fence to the building, hung the panels back in the end of the building. Using up the last of the ties, most of the sand, last of the gravel, and we built a raised pad for the new private cottage to sit on. Due to the elevation around the cottage pad we installed some drain tile to one of the downspouts on the original building and buried it in gravel to prevent water from becoming a pond. Next we moved the cottage onto the new pad.


Before we left Ann had dogs out playing in the new yard.


Day 10 Wednesday – We did some backfilling around the outside of the ties with the left-over sand and dirt. Loaded up and moved onto the next project.


There are still a few things to finalize. The fire hydrant fountain still needs to be plumbed, but we haven’t got the hydrant yet. I need to install a window AC unit in the new cottage. As is usually the case there will probably be a few more things that might come up.


I hope this challenging project will give Ann many years of service and her boarders many years of fun and exercise.

I Love A Good Challenge

And Building A Dog Playground Sure Is That


Challenging and abnormal projects must run in my family. I’ve written about the grain bin house we plan to build for my niece Hannah.

Avoid Feeling Like a Sardine in a Tiny House

How to Determine If Someone’s Trash Can Be Your Treasure

How to Dream Big in A Small Space

How Do You Make Your Dream Become A Reality?

The Next Chapter in “The Saga of the Grain-Bin Home”


Now her Mom, my sister Ann, has once again joined the out of the box project roster.


Ann owns and operates Prairie Paws Lodging, a pet boarding facility. When we built her building originally in 2016, we took into consideration future expansion. We currently are working on the first phase of this expansion. As per an earlier post the original ideas have changed. Rather than adding on to the existing building we are going to set individual private cottages made by Pinecraft


Part of this expansion project includes doubling the size of the existing dog run. This involves landscaping it with artificial turf and installing dog amenities…I’m talking fun stuff like a pool with a fountain, a tunnel, a hill and a rope attached to a flexible pole.


When we built the original facility, we looked for a way to make cleaning up after dogs easy while maintaining a natural look and feel. We accomplished this by installing artificial turf over an elevated bed of gravel bordered by used railroad ties. This allows for liquid to run through and solids to be cleaned up.


Due to the existing run being natural grass and in a naturally low area, it would get muddy in rainy spells. So, when considering the design for the expanded run, it was decided that we would give it the same artificial grass treatment as well as some new fun things for exercising and entertaining dogs.


The project consists of building a 2100 square foot raised pad. The construction consists of railroad ties around the perimeter in rows spaced 12’ apart. In between the ties will be a 4” thick layer of fill sand covered with a 3” layer of ¾” gravel. The gravel and sand will be compacted with a vibrating packer to minimize future settling of the sand/gravel fill. Artificial turf will be spread over the gravel and attached to the ties. The existing fence will need to be removed and reinstalled along with some additional fence. The existing steel pipe framed cover will need to be moved for the building of the raised pad and then moved back to its original location.


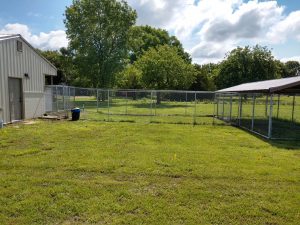
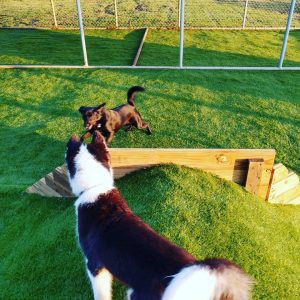
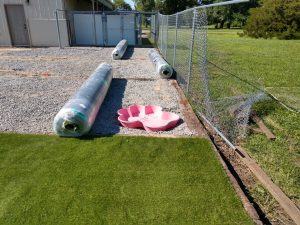
In one corner of the run there will be a small paw shaped pool with a fountain. This will require figuring out the best way to get the water from the pool to the pump and to the fountain. In the future there will be an old fire hydrant serving as the fountain, so this needs to be allowed for now.


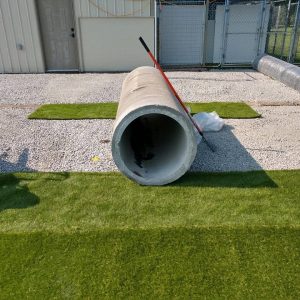
The most challenging part is building the tunnel/hill. We needed to determine what we were going to use for this. We considered pipes, barrels, tanks with the ends cut out and a few other things. Then we found some concrete culverts and the price was right, so this is what we decided on.


With Ann having a commitment for the week of June 17th she had no dogs scheduled to be boarded. This provides a good opportunity to work on the project with minimal disruption to the normal boarding routine. With the challenges of this project it may take longer than a week, check back next week to see.


Check back next week to see a day by day progress of the project, the challenges faced and see how the finished project turns out.

How to Make Home Maintenance Manageable


A Home Maintenance Plan Complete with Checklist


I don’t think anyone likes it when something plugs up, leaks or quits working, especially at home. Home is supposed to be the place where we go to get away from the troubles, not deal with them.


Routine maintenance is a good way to minimize these costly disruptions.


Nothing is permanent. Everything wears out and deteriorates over time. Regular maintenance will help extend the life of your home and that sizable investment. Closing your eyes or looking the other way doesn’t make it go away.


Last week we discussed the importance of having an intentional plan. Today we will look at an excerpt of what this plan should include and why. (Get the full plan here)


Home Maintenance Plan


Home maintenance – Prevents breakdowns, saves money and keeps your home in the best possible condition. This regularly scheduled review can expose conditions that might not otherwise be found. This reduces mental, physical and financial stress and strain.


Seasons happen every year and are a natural part of life. Each of these seasons presents different weather conditions and temperatures which effect your home in varying ways. We also use calendars to schedule our lives. Combining these two things into a seasonal Home Maintenance Checklist breaks a big responsibility into small manageable scheduled tasks.


MONTHLY MAINTENANCE – These tasks should be done every month. You might prefer to schedule one day to do them all or spread them out over the month doing one or two items periodically throughout.


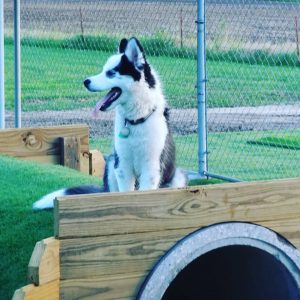
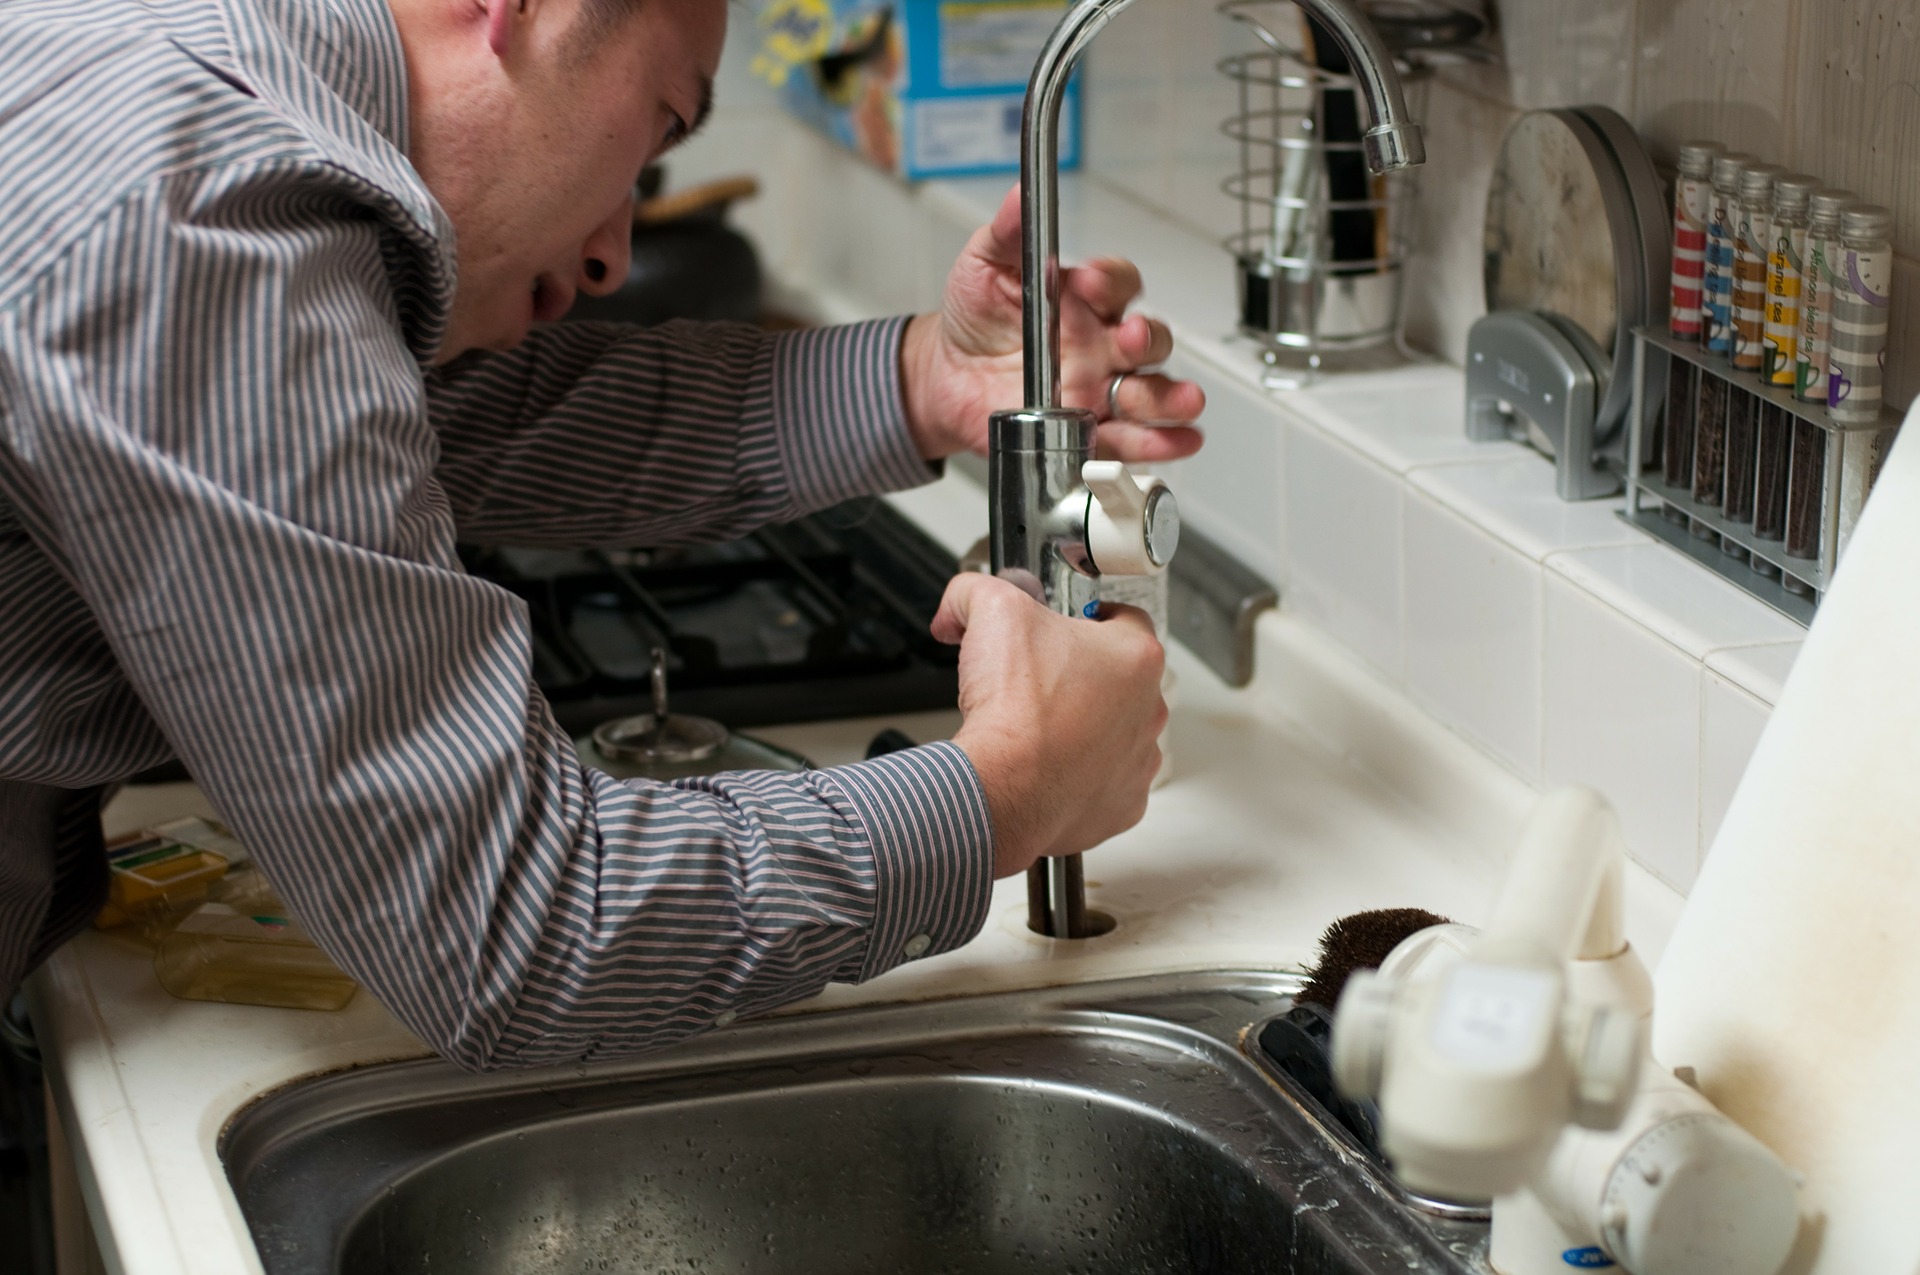
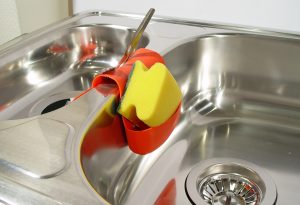
Clean garbage disposals – Put a little vinegar in an ice cube tray, add some water and freeze, then run some cubes through the disposal. Follow up with a little baking soda and warm water. The ice cubes will sharpen the blades, the vinegar and baking soda will break down food and grease build up and will leave it smelling fresh and clean.


QUARTERLY MAINTENANCE – These quarterly tasks, like the monthly ones, can be scheduled for one day each quarter or disbursed through out the quarter at monthly, weekly or other intervals. The important thing is to schedule them and do them.


Change HVAC and/or water filters – How often you change the filter of your furnace / air conditioner will be determined by how much it runs, how many people live in your home, whether you have animals in the house and the geographic location. Also, if you use thinner less expensive filters they should be changed more often.


ANNUAL MAINTENANCE (By Season) – Annual tasks are more seasonal than monthly or quarterly. There is still some flexibility that can be determined by your own preference or life schedule. Some of them are not specific to the season but have been placed as they have, to spread them more evenly throughout the year.


WINTER


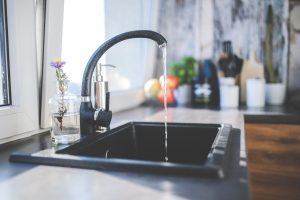
Clean faucet aerators and shower heads – Dirty aerators on the end of your faucets and in shower heads can mean limescale and sediment are blocking the flow and water pressure. Unscrew the aerators and shower heads, remove the aerator and/or screen, soak them in a 50/50 vinegar/water mixture for 30 minutes or until clean, rinse and reinstall. Be careful to pay attention to the order and direction the parts come apart so that you can put them back together correctly.


SPRING
Service central air conditioner – It’s a good idea to have your central air conditioner serviced annually by a professional. Depending on where you live this will generally cost between $100 and $300.


SUMMER


Lubricate and test overhead garage door – Garage doors have moving parts that should be lubricated. With the door closed clean dirt and debris from the track. Use a lithium-based aerosol and spray rollers, bearings and other moving parts of the door and opener (chain or threaded rod). Your garage door should have stop and auto reverse motion detection to sense if an object is in its path. Get a 2×4 piece of wood and place it underneath the open door, then close the door using the opener button. The door should stop closing once it detects the wood and go back up. Also test the photo-electric sensors by moving something in front of them while the door is coming down, it should reverse direction and go back up.


FALL
Service central heating system – It’s a good idea to have your furnace serviced annually by a professional. Depending on where you live this will generally cost between $100 and $300.


The complete list is long and there are still more things that could be added. Keep in mind that everyone’s individual lifestyle, type of construction, geographic location, etc. will determine specifics to your individual plan.


The complete list can certainly seem overwhelming. This is a big part of why routine maintenance gets overlooked. If you break it down into the individual tasks, spread them out and schedule them, it’s doable, like eating an elephant one bite at a time.


(Get the full maintenance plan here)