Having the Right Builder Can Help Protect Your Home Investment

The Question is, How Do You Know If You Have the Right One or Not?

In our last post we discussed how expensive home construction can be and the importance of knowing your builder.

If you’re not careful, building the home of your dreams can become a nightmare.

The number of times I’ve heard people say that building their new home was the worst experience of their life is too many. This is not how construction projects should be remembered.

So, as a construction customer, how can you avoid this from happening to you?

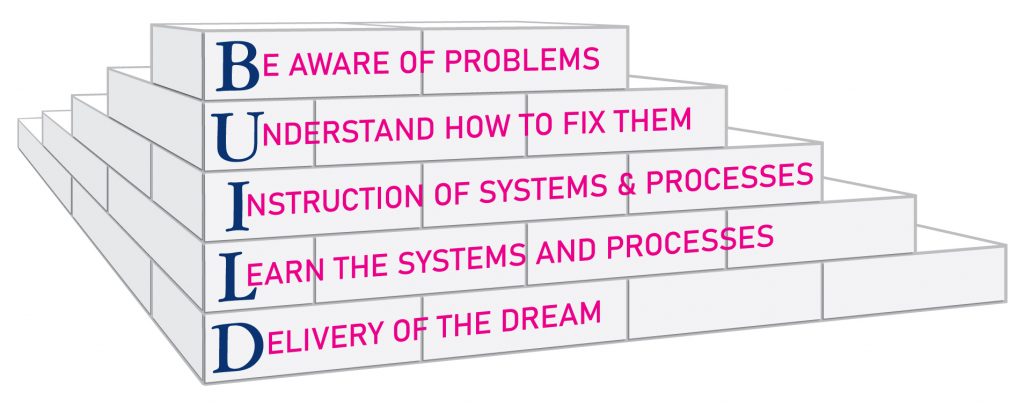
I recommend using the 5-step BUILD process.

This simple system will help you avoid construction catastrophes.

  • Being aware that there are problems when it comes to construction. If you’ve never been involved in a construction project, they can look pretty smooth from the outside. Not so much. Part of the problem is that the professionals that do this every day know this and are prepared for it. Construction customers on the other hand can be surprised when this happens.
  • Understanding what the problems are and what to do about them. If you know about the problems and are prepared it makes the process much easier to handle. There’s nothing quite so upsetting as when you’re expecting one thing and it’s not what you get.
  • Information and Instruction. This step requires some research or guidance from someone who knows construction. This Information includes things like knowing what the processes and procedures of construction are or simply knowing what questions to ask. You can search the internet for the basic information but if you don’t know construction, it can be hard to tell what you can trust and what you can’t. This is where it is helpful to find a trusted professional.  
  • Learning can give the inexperienced construction customer confidence to ask questions of a professional builder. Being Informed and Instructed will help you Learn about the construction process so that you won’t be afraid to ask your builder questions.

A big part of the problem is that most builders either don’t realize customers are intimidated by them or they don’t care.

  • Delivery of the DREAM is the final step of this process. This should be the goal of both the customer and the builder. It’s where all the scary, hard work and time pays off. The customer gets the home of their Dreams and the contractor makes a profit.

To achieve that dream it’s important to have a builder you can trust.

Bridging this gap between construction companies and customers is why here at Solution Building we’ve developed the 5-step BUILD process. This will help construction companies Be aware, Understand, get Information and Learn. Implementing this process pays off for both the customer and the builder when the Dream is Delivered.

This system includes a Business BUILDing Toolbox for Construction Companies full of document templates and instructions for things like:

  • Proposals
  • Contracts
  • Change Orders
  • Payment Applications
  • Profit Comparisons
  • Job Costs
  • Saving Account Transfers
  • OneNote systems and processes

There are also individual and group training courses available as well as custom designing and building of business systems for individual companies.

If you know of a builder or construction company that you think could benefit from this 5-step BUILD system, have them contact us for a free 30-minute construction company consultation.

Your Home is One of Your Biggest Investments

That’s Why it’s Important to Know Who Your Builder Is

Building a new home is expensive, but the same is true for remodeling.

Let’s face it…construction of any kind costs a lot.

Currently the average cost to build a new house is around $300,000.00 not including the land. Like anything, this price will vary depending on what you want in your dream home. There’s a wide range of materials and workmanship that will affect the final price. The size of the home and location are also determining factors.

The national average price per square foot is $150.00. This means that a $300,000.00 price would get you a 2,000 square foot home.

The final price comes down to what you want in your home. It’s like looking at a bag of groceries – until you know what’s in it, you can’t know what it’s going to cost.

It makes a difference whether that bag is full of tissue paper or steak.

Most people don’t realize how much these choices can affect the price. Some of the things that have the biggest impact are –

  • Construction style – This could be a simple ranch style on a concrete slab or a multi-level house on a finished basement with high ceilings, a complicated roof and wrap around porches or somewhere in between.
  • Windows – These can be simple single hung vinyl windows all the way to custom triple pane wood windows with window treatments between the panes.
  • Cabinets –This is another place where there is a big difference in quality and styles. You could use simple basic lumberyard cabinets with veneered manufactured wood, or you might choose custom made real wood cabinets with specialty options.
  • Countertops – Can be pre-manufactured plastic laminate going all the way to custom solid surface or marble.
  • Flooring – There are a lot of flooring options, both solid surface and carpet. Sheet vinyl flooring is much less expensive the ceramic tile, and, in the middle, there’s a range of luxury vinyl. Carpeting can be a lightweight inexpensive product or a very expensive wool.
  • Plumbing fixtures – Even the lower priced plumbing fixtures aren’t cheap, and higher priced ones can be scary expensive.
  • Electrical fixtures – It’s amazing how many different styles and qualities of electrical fixtures there are, not to mention the number of cool new electrical gadgets that are out there.
  • Woodwork – You can choose to have simple basic base and casing installed or you can have multipiece custom made woodwork done. Not to mention that there is an enormous number of woodwork things like stairways, mantels, post and beams that can be done.
  • Finishes and features – Painting and staining are one of those things that most people see as a simple process that shouldn’t cost that much. What they don’t realize is that there is a lot more to it than simply brushing on a coat of paint. Preparation is the part that makes a huge difference to the finished product. The same is true for staining and applying the clear finish. This isn’t even taking into account custom paints and finishes.

These things are just a small part of what needs to be considered when building your dream home, and this is just the financial part.

In addition to the dollars and cents, there’s an emotional cost that comes with a home construction project. The emotional part can be a lot more expensive and is harder to measure. Most of the time this part of the construction process isn’t given much though.

That’s why it’s important when considering a construction project to know how to BUILD.

This doesn’t mean knowing everything about construction, rather it means knowing how to navigate the process so you can avoid the overwhelm that happens too often.

This is where having the right builder comes in. In our next post we’ll explore what you should look for in a builder and how rare it is to find a good one.

Now I’m Beginning to See What Virtual Construction Consulting Looks Like

Just Because I Can’t Touch it Doesn’t Mean That I Can’t Help Fix it

It’s amazing what has been made possible with computers, smart phones and the internet. Virtual construction consulting is just one of those things.

The topic of virtual construction consulting came up several months ago when I was talking with a friend, who lives more than a thousand miles away, about his construction project. He and his wife bought some property that belonged to an older lady and the buildings had fallen into disarray. As we talked, I found myself wanting to go help him fix things.

The problem was that thousand-mile commute.

This is when the whole virtual construction consulting thing began to take shape. We began talking through the different things that needed to be done. I shared some of these construction issues in a couple of previous posts. One was what to do when you have a construction problem but don’t know what to do about it. Another was about how to make rafters long enough when you don’t have a “board stretcher”.

Today we’ll discuss a different project.

The problem we’ll be discussing today begins with rotting posts that are supporting (or not) an 8’ overhang.

Here’s the list of issues that we will address.

  • Roof support posts set inground aren’t supporting the roof because they are rotting.
  • Roof sagging due to lack of support because of rotting posts.
  • Header at the roof eave is not adequately attached to the posts or sufficient size to carry roof load.

Roof support posts set inground aren’t supporting the roof because they are rotting at the ground.

To fix this problem, there needs to be adequate concrete support under the bottom of the posts and then you need to fasten them to the concrete with post base brackets that will reduce the likelihood of future rot.

There are a couple of options for this. First is to remove the 4×4 posts, dig a hole outside of the concrete slab, pour new concrete piers and set the posts in brackets on top of the piers. Second would be to move the posts in and set them in post brackets on the existing concrete slab.

Moving the posts in would be the simpler and less expensive of the two options. It would mean no digging, no forming and no pouring of concrete.

The downside to consider is by moving the posts in, there will be more roof extending beyond the support beam.

With the current overhang only about a foot…this won’t be a problem.

Roof sagging due to lack of support because of rotting posts.

This problem will be fixed by moving the posts in and setting them on the concrete slab.

By stretching a string line down the outside bottom corner of the rafters from one end of the roof to the other, there will be a straight line that will be a target when reinstalling the posts.

The roof can be supported temporarily by 2x4s while the posts are being moved and reinstalled.

Header at the roof eave is not adequately attached to the posts or sufficient size to carry roof load.

Currently the header is a single 2×6 nailed to the side of the 4×4 posts and spanning approximately 8’. Code says that a header carrying a roof and spanning 8’ should be twice this big.

The single 2×6 will need to be removed to allow for the moving of the posts. Once the posts have been reinstalled, the salvaged 2×6 can be attached back to the 4×4 posts. Then a second one can be attached to the first. After both are in place and nailed together, carriage bolts can be installed through both 2x6s and bolted to the 4×4 posts.

An additional action that can be taken to assist in strengthening the roof is the removing of the 1×6 fascia board and installing a 2×6 in its place. This will help carry the roof load by distributing the load between the rafters.


This is today’s virtual construction consulting.

There are more in-depth instructions that we could go into, but to keep this post from becoming too long, we’ll stop here.

If you or someone you know has some construction questions that a virtual construction consultation might be able to give you some “support” with, leave a comment below.

What if the Rafters Aren’t Long Enough to Reach the Ridge Beam?

We Explore Other Solutions, That’s What

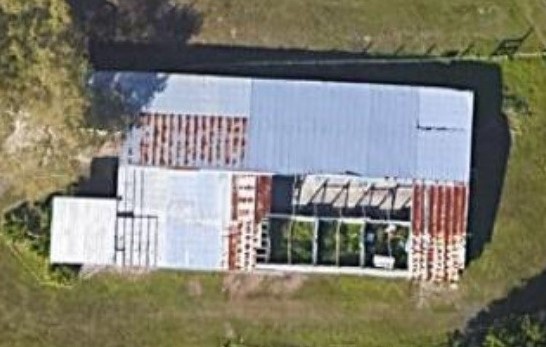
A couple of weeks ago we talked about a construction problem and what to do about it. This problem involved rafters not being attached to the ridge beam properly and a possible solution. That solution required the rafters to be long enough…which they aren’t.

So, now what do we do?

We still have the same problem of the rafters not being connected sufficiently to the ridge beam and how to fix this.

The previous plan was to take the top end of the rafters loose from the ridge beam on both sides of the roof, cut them to fit against the side of the ridge beam, drop them down and fasten them to the ridge beam.

This second option is going to require more “undoing” than the cutting and dropping of one end of the rafters would have. However, using this solution, we will not have to do any work to the half of the roof where the rafters are sitting on the ridge beam.

It’s going to require the removal of the metal roofing panels and the wood purlins from half of the roof. Anytime something is “undone” or removed it takes time that isn’t being spent on “doing”. However, as is normally the case with repairs and remodels, “undoing” is a part of the process.

Avoiding the undoing was the biggest benefit of the previous solution.

One of the issues that started the construction discussion was that there is some roofing missing from the building. It just so happens that the roofing that is missing is on the same side of the roof that needs the rafters fixed. This means that some of the “undoing” is already “undone”.

What does this new option consist of? –

  1. Removing the balance of the roof metal (salvage for reuse if possible) –

Remove the existing fasteners (nails or screws) from the roof metal. If they are screws with rubber washers and the washers are in good condition, the screws could be saved for reuse. If they are nails, or screws with missing or damaged washers, throw them away. If the sheets of metal are salvageable (not bent, deteriorated or having holes) save them for reuse.

  • Removal of the roof purlins (salvage for reuse if possible) –

Pull the nails or remove the screws that are attaching the existing wood 2×4 purlins to the wood rafters. In the pictures, most of these purlins appear to be in good shape. As long at they are not split, broke, rotted, or too warped or bowed, salvage them to reuse.

  • Removal of the existing rafters (salvage for reuse) –

Remove fasteners (nails, screws and/or carriage bolts) that are attaching the rafters to the ridge beam at the top and the posts at the bottom. Save the carriage bolts and nuts for reuse.

  • Relocating the salvaged rafters

Flip the rafters end for end putting the bottom at ridge beam. This is so you can use the existing bolt hole in the post and put a new hole in the rafter. Sit the top of the rafter on the ridge beam, next to the rafters on the other side of the building. Attach the two rafters (both sides of the ridge) together and attach the moved rafter to the ridge beam. Drill a new bolt hole in the rafter at the bottom and attach it to the post.

  • Install the salvaged purlins to the top of the rafters

Attach the 2×4 wood purlins to the top of the rafters matching the previous purlin layout. This should allow for salvaged roof metal to be installed using the exiting holes from the previous fastening.

  • Install roofing metal to the roof purlins

Starting at the eave of the roof, install the first sheet of roofing metal making sure to align the corrugations with the panels on the other side of the roof. Assuming those panels are laid out correctly. Install the panels with washer headed screws to seal the holes and prevent leaks. Install the next panel above, overlapping so that rain will drain properly preventing leaks. Continue this process overlapping each new sheet over the one next to it the width of one corrugation.

  • Install new ridge cap (due there not being any existing) –

The ridge cap will lay over the ridge of the building and be screwed to the corrugations of the roof panels on both sides of the ridge with washer headed metal to metal screws.

One additional thing that may need to be done with this solution is to add some additional support posts under the ridge beam. This is due to the rafters sitting on top of the ridge rather than being attached to the side of it. To determine if and how many post would be needed, we need to look at the code book and determine the current spans.

As it is with any construction project, there are numerous options. The important thing is to look at them and determine which one best fulfills your needs.

I Know That I Have a Construction Problem…Now What Do I Do?

Just Knowing That There’s a Problem is More Than Half the Battle

As we go through the daily actions of living our lives, we become oblivious to things on the periphery. This is especially true of things outside of our expertise. This lack of awareness includes things like construction if you’re not actively involved in the building industry.

When there is a situation that catches the attention of someone who is not a construction professional, it begs the question of…what do I do?

If you know someone who is in construction, you could ask them. But what if you don’t know anyone or don’t trust the ones you do know?

This is where virtual construction consulting comes in.

We discussed virtual construction consulting previously. Today we’re going to actually do some consulting.

The question:

There’s a gap between the tops of some of the rafters and the ridge. Some have short boards fastened to the sides of the rafters sitting on top of the ridge. Some have hurricane clips attached to the rafter and ridge “supporting” the rafter.

This doesn’t look right. Should it be like this?

NO IT SHOULDN’T!

This is an example of – whoever built this did not know how to construct things properly.

The problem:

In construction everything needs to be supported to transfer the weight of the building to the ground. You can’t just put a board up in the air and let go expecting it to stay. Gravity will win.

According to the residential building code, rafters should not be more than 1 ½” offset from each other on the ridge beam. The rafters should be fastened to the side of the ridge beam. The ridge beam should not be less in height than the cut end of the rafter.

Without getting off into the weeds of engineering, just know this…

The rafters are supporting the ridge, not the other way around.

The question:

What is the most cost-effective way to fix this problem?

There are several ways that this could be fixed, but the primary point is cost-effective. Without going through all the scenarios here today, let’s focus on my recommendation.

The goal is to get the rafters attached to the side of the ridge.

The answer:

To do this, it will require disconnecting the rafters from the ridge beam, cutting the rafters to the correct angle to fit against the side of the ridge beam and then lowering the rafters down to align the top of the rafters with the top of the ridge beam.

Before starting it must be determined if the existing rafters are long enough to be cut at an angle and still reach the side of the ridge beam?

This will be determined by measuring from the bottom end of the rafter to the top corner of the ridge beam. This will be the length needed. Then measure from the bottom end of the rafter to the top end of the rafter. If there is enough length to make this cut, then this will work.

Once the length question has been affirmatively answered then the actual work can proceed.

Starting at one end, put some temporary support under a section of rafters. Disconnect the rafters from the ridge board, then begin lowering the rafters one by one to align with the top of the ridge beam.

Once you’ve done this, the rafter can be attached to the ridge beam by nailing at an angle through the end of the rafter on both sides into the ridge beam. Or the rafters can be fastened to the ridge beam with rafter hangers.

Continue this process from one end of the building to the other, doing rafters on both sides of the ridge beam as you go. This is critical because you need to keep equal pressure on both sides of the ridge beam to keep it centered in the building.

If there is siding on the gables, it will need to be removed so that it can be recut to match the new roof slope.

With the information I have, this appears to be the most economical way to fix this problem.

Knowing that there was a problem was the first half of the battle.

The second half is the physical fixing part. Now it’s up to you to put your tool belt on and go to work or hire a qualified contractor. Either way you now have some written instructions for this project.

What If You Want to Do a Construction Project but Don’t Know Where to Start?

That’s Where the Right Qualified Virtual Consultant Can Help

We all have our areas of expertise. One of mine is construction processes and systems.

These are a couple of things missing from most DIY construction programs on TV as well as many of the “do it yourself” internet videos. They can be helpful, but typically they oversimplify things and normally only give you a small snippet of the big picture of a construction project.

As a construction professional that has been doing this for forty years, trust me, there’s a lot more to it than a sixty-minute TV program or a five-minute video.

When I meet with a customer, I instinctively know what questions need to be asked and answered.

It’s different if you’re not a contractor and this is where a lot of problems with construction projects begin. Either from a “do it yourself” construction customer or when hiring someone who isn’t qualified.

The overwhelm starts and it often leads to corner cutting, things being done in the wrong order or completely left out.

Here’s some of the information that I gather early in the process –

            Measurements and dimensions, existing and new

            Building materials, existing and new

            Pictures of existing construction and pertinent areas involved in the new

            Design ideas, products and finishes to be used

The information gathered early in the process is important to the project moving forward as smoothly and economically as possible.

Asking and answering the right questions early in the process is critical to a successful project. Once you’ve determined what your dream project is, it needs to be broken down into categories. Then these categories should be divided further into smaller tasks.

Imagine a construction project as a giant puzzle with hundreds of thousands of pieces. These pieces need to be put together in the right place and in the right order. It’s hard when you don’t know what that is.

A qualified virtual consultant can help you put the right pieces in the right place.

I developed a list of categories and tasks that I use when doing a construction proposal so that I don’t overlook things. This “Bid Sheet” is where I gather the information that pertains to each specific task.

Here’s a small excerpt from my bid sheet template –

These are just three of the 17 categories of the construction process.

The next issue for the “do it yourself” construction customer is…what do all these tasks mean? What is included in them?

These questions prompted me to begin developing just such a list.

Here is a matching excerpt from it –

Once I have this explanation page finished, I will make a link available at the Solution Building web site.

This explanation page will be a good tool for a “do it yourself” construction customer, someone hiring a professional or as a helpful referral when talking with a qualified virtual consultant.

Virtual Construction Consulting…What’s That Even Going to Look Like?

Pretty Much the Same as In Person, Except For the “In Person” Part

Virtual construction consulting…that’s an interesting idea. What is virtual construction consulting anyway?

Let’s start with construction. What is construction? Construction is the act or process of constructing. The art, trade or work of building. Construction is a pretty straight forward concept. Most of us are familiar with construction.

Construction is where I’ve spent most of the last 40 years. During that time, I’ve accumulated a substantial amount of experience and expertise.

Consultinggiving expert advice to people, or other professionals in a specific business or trade. This is a term that gets used a lot without giving it much real thought. The key to this is the word EXPERT.

Giving expert advice is something that I’ve been doing for my construction customers for years without realizing that’s what I was doing. This happens naturally. I find out what the customer’s construction desires are and share my expertise to help them achieve their construction dreams.

Virtual is a word that is currently used a lot. There are multiple definitions for this word, but generally at the present, it refers to digital media, computers and emulating the function of another system or device.

Virtual technology allows us to communicate, connect and interact with people around the world.

Virtual construction consulting removes the opportunity for “on site” instinct that comes from years of experience. For me it shows up without me even realizing that it’s happening.

The problem with virtual is not getting the “in person” feel for the project.

With “in person” consulting there is a limited number of people that can be helped due to distance.

This limit to the number of people I can help is what prompted me to consider doing construction consulting virtually. The question then is…what is it going to look like?

The biggest “virtual” hurdle to overcome is the 3rd party gathering of information. The not being able to get the in person feel.

Like any other problem we encounter there is a solution. It may take some out of the box thinking but it can be done.  

I’m currently working with a long-distance friend to provide construction consulting virtually.

We will continue to share the ups and downs of the process as we develop this virtual construction consulting service.

What Kind of Jar Do You Want to Use?

This Needs to Be Determined Before We Start Putting the Rocks In

Most of us are familiar with the time/priority analogy of putting rocks in a jar. I first became aware of this in Steven Covey’s book, Seven Habits of Highly Effective People.

If you’re not, here’s how it goes:

One day this expert was speaking to a group of business students and, to drive home a point, used an illustration I’m sure those students will never forget. After I share it with you, you’ll never forget it either.

As this man stood in front of the group of high-powered over-achievers he said, “Okay, time for a quiz.” Then he pulled out a one-gallon, wide-mouthed mason jar and set it on a table in front of him. Then he produced about a dozen fist-sized rocks and carefully placed them, one at a time, into the jar.

When the jar was filled to the top and no more rocks would fit inside, he asked, “Is this jar full?” Everyone in the class said, “Yes.” Then he said, “Really?” He reached under the table and pulled out a bucket of gravel. Then he dumped some gravel in and shook the jar causing pieces of gravel to work themselves down into the spaces between the big rocks.

Then he smiled and asked the group once more, “Is the jar full?” By this time the class was onto him. “Probably not,” one of them answered. “Good!” he replied. And he reached under the table and brought out a bucket of sand. He started dumping the sand in and it went into all the spaces left between the rocks and the gravel. Once more he asked the question, “Is this jar full?”

“No!” the class shouted. Once again he said, “Good!” Then he grabbed a pitcher of water and began to pour it in until the jar was filled to the brim. Then he looked up at the class and asked, “What is the point of this illustration?”

One eager beaver raised his hand and said, “The point is, no matter how full your schedule is, if you try really hard, you can always fit some more things into it!”

“No,” the speaker replied, “that’s not the point. The truth this illustration teaches us is:

If you don’t put the big rocks in first, you’ll never get them in at all.”

Dr. Steven R. Covey, First Things First

I think this is a great example of prioritization.

This analogy uses a wide mouth gallon jar…but what if that’s not the jar we want to use?

This is where we need to start. What is the jar that we want?

Construction projects are like this. They are big jars filled with lots of rocks, gravel, sand and water.

A good construction contractor can help you through the process of determining what jar you want and then help you put the right rocks in, in the right order.

Too many construction customers don’t spend enough time in the beginning thinking and planning for their project. They see construction as a, go to the construction project store and pick something off a shelf.

Unless you’re buying a spec home or a trailer house, construction projects don’t work like that.

Sorting through ideas, designs, finishes, etc. is the time-consuming part. But if this part is done early on…the rest of the project will go much smoother.

This is why you need to decide what kind of jar you want before you start trying to cram in the rocks.

Construction Projects (Like Life) Don’t Have to Be Overwhelming and Daunting

Both Are Within Our Control, But It’s Up to Us to Exercise the Superpower of Choice

Overwhelming and daunting is one thing that construction projects and life have in common. Both are big and full of opportunities to make mistakes. This fear of mistakes causes us to drag our feet and not make decisions.

Hesitance to make decisions is the stumbling block that prevent people from doing great things.

I had a conversation with a friend from a mastermind that is struggling with working through both a construction project and life change. We discussed how to figure out how best to move forward.

Every big decision we’re faced with in life is made up of little pieces.

Our responsibility is to sort through those little pieces and make a decision. The difficult part is when the decisions that need to be made are in an area of life that is out of our comfort zone.

This is when we have to decide if we’re going to explore, learn and implement this new knowledge or employ the help of an expert. This is one of the hardest decisions.

In Andy Andrews book, The Traveler’s Gift, David Ponder is given the Responsible Decision from President Harry Truman. In this decision President Truman writes, “When faced with the opportunity to make a decision, I will make one. I understand that God did not put in me the ability to always make right decisions. He did, however, put in me the ability to make a decision and then make it right.

The rise and fall of my emotional tide will not deter me from my course. When I make a decision, I will stand behind it. My energy will go into making the decision. I will waste none on second thoughts. My life will not be an apology. It will be a statement.

The buck stops here. I control my thoughts. I control my emotions. In the future when I am tempted to ask the question “Why me?” I will immediately counter with the answer: “Why not me?”

Challenges are gifts, opportunities to learn. Problems are the common thread running through the lives of great men and women. In times of adversity, I will not have a problem to deal with; I will have a choice to make. My thoughts will be clear. I will make the right choice. Adversity is preparation for greatness. I will accept this preparation.

Why me? Why not me? I will be prepared for something great!

I accept responsibility for my past. I control my thoughts. I control my emotions. I am responsible for my success.

Andrews, Andy. The Traveler’s Gift (pp. 33-34). Thomas Nelson. Kindle Edition.

I will not have a problem to deal with; I will have a choice to make.

Choosing to look at situations as problems it’s more likely that procrastination will set in. Making a choice and moving forward is a more productive way to deal with things.

The main thing to remember is that we have control. We can choose…but choosing requires action.

What’s Needed for a Good Construction Contractor is Simple

I Said It Was Simple…I Didn’t Say it Was Easy

Over the past couple of weeks, I’ve written about the difficulty in finding good, qualified construction contractors and how this problem is amplified after a disaster such as a hurricane, tornado, flooding, etc.

Finding a good construction contractor is a huge problem and has been around for a long time. I’ve thought about this off and on for years and recently has been one of those “on times”.

Why is this a problem and what do we do about it?

As I’ve been thinking about it, I’ve concluded, that even though it’s a big problem, the solution is simple…but hard.

The key to this solution is…

Treat others the way you would want to be treated.

Granted, different people have different ways they want to be treated, because each of us is different. Add to that, the long-term acceptance of “this is just the way it is” and it becomes more difficult than ever to solve the problem.

To clarify how we should treat others, we should use God as a measuring stick. Do your work with all your heart, as if you are working for God, not for men. Colossians 3:23

Working as if for God is the opposite of how the world operates.

As I was speaking with a customer just last night, they were telling me how they had been trying to find someone to do their project for years.

They had contacted several contractors who said they would come by and look at the project and never did.

They met with some who did show up only to never be heard from again.

With one contractor they got as far as getting a price but then they could never get him to come do the work.

Equally as bad is when a contractor does agree to do the work, but the customer never knows if or when they’re going to show up and then the  job drags out and out and out.

This is an unacceptable way to treat God or anyone else.

The first and most important thing a good construction contractor needs is…COMMUNICATION.

Communication is more than just talking. It includes:

  • Listening to find out what the customer wants.  
  • Clearly explaining the work to be done, what it’s going to cost and when it will be done.
  • Transparency and honesty. Letting the customer know what to expect and when.
  • Willingness to be vulnerable. If you can’t be there when you said you would…let them know.

I plan to unpack what’s needed from a good construction contractor more over the next few weeks.