How Can I Determine Which Thing on the List Should Be Done First?

It’s Amazing How Things Become Clear with a Limited Amount of Time

The discussion in our mastermind group this past week was around productivity and how to be more productive. It started with the question of, what does productivity mean and what does it look like to be productive?

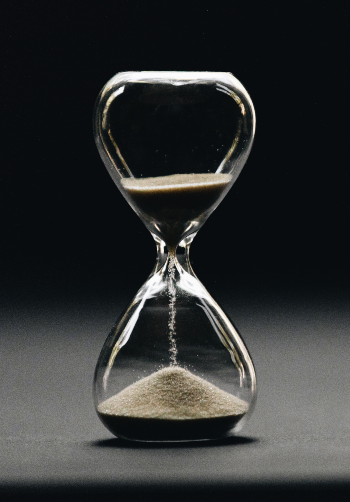
What is productivity? Now there’s a question for you to answer. We have a limited amount of time in a day, a year, or a life.

Productivity generally refers to the ability of an individual, team, or organization to work efficiently within that time in order to maximize output.

High productivity results from a mix of factors: motivation, personality, natural talent, training or education, environment, support from others, time management, and things that happen that are outside of our control.

Output / Input = Productivity

So, what is output? This is one of the things that makes the question of productivity so hard to answer. But this is where we need to start with the productivity question. What is the most important thing to accomplish in this finite amount of time we’ve been given?

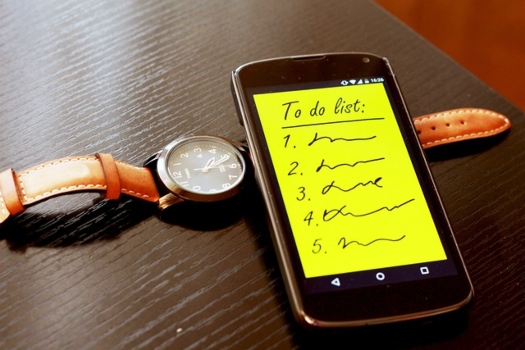
There are so many things trying to get on the “to do” list and each one competing for the top position. Deciding which one should get that spot is tough. There are so many great and important things that we need or want to do.

It’s easy to say that we have limited time, but hard to actually schedule things that way.

My computer’s battery is not lasting as long as it did when it was new. Recently while working out of the office, without the power cord, I had 2-3 things that I wanted to get done before the computer shut down. This limited time forced me to sort and prioritize them.

How do we decide what to say yes to?

Emergency situations often require triage. This is the process of prioritizing a patient’s treatments based on the severity of their condition and the resources available. In these situations, victims are divided into three categories.

  • Those who are likely to live, regardless of what care they receive;
  • Those who are unlikely to live, regardless of what care they receive;
  • Those for whom immediate care might make a positive difference in outcome.

These choices aren’t easy and often require a quick “gut decision”. A pre-determined system, training, and experience aid in the process and provide for the greatest number of survivors.

Another life and death choice is deciding who gets a transplant when there are a limited number of organ donations available. Take for example a set of twins who both need a liver transplant, and their father has one liver to give. Which little girl gets it? The early thoughts of a father would be to give half to each. The problem with this, half wouldn’t help either. The final decision will be determined by which one needs it most or which one is most likely to survive.

Most of the choices that we make in business aren’t this critical…or are they? The decisions we make can mean life or death for our business.

In medical life or death situations, there is a system and plan in place before hand. This same type of system should be implemented in our business. We should predetermine how we are going to choose the most important thing to the life of our business. This is where things get hard.

What makes one thing more important than another?

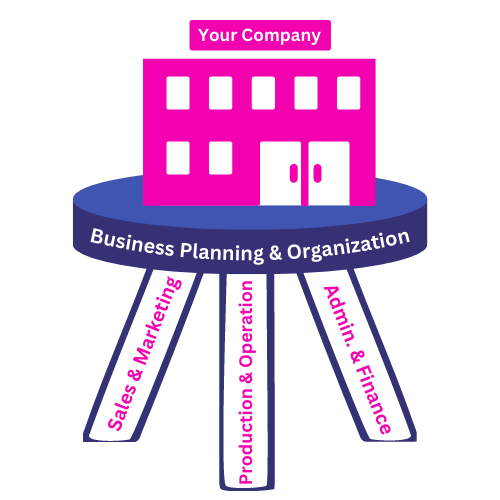
What should be the highest priority? Should it be production or proposals, record keeping or customer service, marketing or staff? We’re faced with tough decisions in business every day.

I can’t answer this question for you, but having a “business triage” system will give your business the highest chance for survival.

Our 5-step BUILD process helps us prioritize and manage all the hundreds of decisions we’re faced with every day in our business. You can find out if the business building tools are right for you here.

How a Business Plan Can Help You Keep Your Business from Crashing

It’s Hard to Keep Your Business in Balance Without a Plan

Most of us who are self-employed spend way too much time feeling like our businesses are out of control. We started our businesses with grand ideas and dreams. Then one day we woke up and wondered what in the world we were thinking.

Last week I wrote about needing a plan for building your business and how many businesses fail because they don’t have one. We compared a plan for building a business to a blueprint for building a building.

I recently finished reading the E-Myth Revisited by Michael Gerber. This book does a great job of pointing out the misconceptions around starting your own business and shows how commonplace assumptions can get in the way of running a business.

Michael walks you through the steps in the life of a business, from entrepreneurial infancy, through adolescent growing pains, to the mature entrepreneurial perspective.

Gerber draws the vital, often overlooked distinction between working on your business and working in your business.

As I read through the book I was reminded and encouraged to review and improve our business and the operating procedures. If we don’t have a plan and aren’t intentional about implementing it, we are doomed to failure.

Business is like a three-legged table. If one leg is short, it gets kind of wobbly.

I know I have felt this way about my business and sometimes still do. This is why after reading the book I was reminded that I have not been giving each of the leg’s equal attention.

You have probably heard the saying ‘feast or famine’. This is used quite often in the building industry. It refers to the common problem of having way too many projects to do. Or not having enough and worrying about how you are going to pay the bills if you don’t get some work soon.

Sometimes this is caused by situations beyond our control. The economy, the weather, or some other external force. More often than not it is due to an ‘out of balance business’…like a table with a short leg.

As in Gerber’s book, we usually start a business knowing the trade but not having any experience in operating a business. We know what we know and don’t know what we don’t.

We started out by learning our trade as an apprentice, while working for someone else. I know this is how I got started. The problem with this is that while I learned how to build a building, I wasn’t taught how to build a company.

Like a three-legged table, when all the legs are the same length, it provides a level sturdy platform for my company to sit on. When any one or two of them is short the table starts leaning and begins to tip over. If it tips too far the company will slide off.

It’s never good when a company crashes onto the floor.

The three table legs of a construction company are:

1 – Sales/Marketing – Searching for and finding customers that you can help by providing your service and/or product through word of mouth, advertising, and awareness. Meeting with potential customers, determining what they want/need, and preparing estimates, proposals, and contracts.

2 – Production/Operations – Organizing, scheduling, and maintaining the projects. Determining who the right people are to perform specific tasks. Knowing the parts that are needed and making sure they fit. Maintaining communication between all parties involved. Ordering, delivery, storing and returning of building materials. Facility and equipment maintenance and repairs.

3 – Administration/Finance – The preparation of documents needed to communicate, track, and record all aspects of the business. The filling out and filing of income, expense, banking, and tax papers. This leg is one of the easiest for ‘tradespeople’ to neglect and can cause the table to lean quickly.

The top of the table – This is the big picture planning and organizing of the company. It’s what connects the three separate legs. It’s one of the hardest parts for the tradesman to understand and the most important. If there is no attention or work done on this part, you may just as well throw the legs in the fire and go to work for someone else.

It’s easy to give too much attention to one or two legs and forget the other parts. To get so focused on the production of a project and forget to follow up with a new customer. To get so into preparing proposals that we forget to invoice. To work so diligently on tracking expenses that we don’t leave enough time for working on the project.

There is no perfect solution to keep the table from ever leaning. The most important thing is to BE AWARE that it can happen, UNDERSTAND the problem, gather INFORMATION and get INSTRUCTIONS about the tools needed to keep the business from crashing and LEARN how to use these tools in your business.

Keep your business from crashing by intentionally working to keep the table balanced.

Portions from a previous post on 4/30/16

How Building Your Business Is Critical to The Success of Your Business

Like the Construction of a Building – You Need a Plan for Your Company

If you own your own business and aren’t being intentional about the organizational operation of your company, it is likely that you won’t make it past your 5th year. This is according to the Bureau of Labor Statistics.

Just think about the number of businesses that you have seen come and go.

Whether you are a solopreneur or have a team. It doesn’t matter if you have been in business for 30 years or just starting out. Regardless of the kind of work you do, the organizational plan is just as important as the work you do…maybe more.

I know in my 40 years of being in business I have learned some lessons the hard way. Let me tell you, the tuition for ‘The School of Hard Knocks’ (SHK) is expensive. There were times when I got behind on taxes to pay bills and other times when I got behind on bills so that I could pay taxes. Neither of these is a very good business plan.

One of my SHK professors once told me, “That when you steal from Peter to pay Paul, you make Peter a Paul bearer”. If you want to avoid the need for a pallbearer for your business…you need a plan.

Starting a business without a plan is not a very good plan.

Often, someone who has learned a trade or a craft decides, for whatever reason, to go into business on their own. Most of the time they have given little, if any, thought to business structure.

You show up every day working hard and then…surprise, you owe some taxes and don’t have the money to pay them. You needed a plan…a Blueprint for Building a Better Business.

There are a lot of similarities in constructing a sound building and constructing a profitable business.

  • Both need to start with design plans – The thing that gives you a clear direction of what you want the outcome to be.
  • Both need an architect – The person that can see the vision of what the finished product will be.
  • Both need a good solid foundation – The thing that will support you when the storms come.
  • Both need a good framework – The thing that holds everything together.
  • Both need a builder – The person that reads and understands the plans and puts all the different pieces together correctly.
  • Both need the proper tools – These are what allow the pieces to be shaped and fastened together in the right places in the right order.
  • Both need a good team – These are the different people with the different skills and knowledge needed.

It doesn’t matter if you have been in business for years or are just starting, YOU NEED A PLAN. If you would like to minimize the time you spend attending ‘The School of Hard Knocks’, then keep following our blog. We are working on some Business Building Solutions for just this purpose.

In what areas of building your business would some ‘higher education’ be helpful?

Originally posted 2/24/18.

How Using the Payment Application Tool Communicates Clearly with Construction Customers

Learning About Business Tools Isn’t Necessarily Fun, but it is Necessary for Business Success

I know that the topic of the Payment Application over the past couple of weeks hasn’t been one of the most exciting topics. Learning about any tool, how it works, and how to use it isn’t one of those things that scores high on our “fun meter”.

This is true for most men. Just think about Christmas time and how most of us guys just want to dive in and put that new toy together without bothering with the instructions. We don’t need any stinking instructions!

This, “get ‘er done” attitude gets amped up even more for those of us in construction. Afterall…building things is what we do.

However, you know as well as I do that, more times than not, this doesn’t turn out so well.

That’s why years ago as I struggled trying to put my business together, I decided I needed to read the instructions. The problem was…I couldn’t find the tools or the instructions. So that’s why I decided to make my own Business BUILDing Tools, complete with instructions. 😊

One of those tools is the Payment Application.

Last week we went through the process of getting started with a blank Payment Application and getting it filled out so that it is ready for the customer’s first payment. Now let’s look at preparing the Payment Application for recurring progress payments.

Preparing for the next progress payment –

Step 1 – Updating the application information – In the application information box, change the application number to the next sequential number i.e., from 1 to 2. Change the date from the previous date to the date through which this application includes. This consists of the material provided or ordered and work done by this date.

Step 2 – Moving dollar amounts from work completed to previously billed – On the previous Payment Application you have dollar amounts in one or both columns D (materials presently stored or ordered) and E (work completed this period). The numbers in these columns need to be added together and added to the number, if any, already in column F (previously billed).

Step 3 – Clear dollar amounts from Work Completed columns – After completing the previous step you need to clear the dollar amounts from both columns D and E.

Step 4 – Confirm the dollar amounts – After clearing the dollar amounts from columns D and E you need to check the dollar amounts in columns F (previously billed) and G (total completed and stored to date). These numbers should be the same. Also compare these numbers to column G on the previous Payment Application to confirm that these numbers are correct.

Step 5 – Entering dollar amounts – Now you can start entering new dollar amounts for Material Presently Stored or Ordered (column D) and Work Completed this Period (column E). These numbers will be determined by the material provided and the work done since the last application.

Step 6 – Figure and enter sales tax – Depending on the jurisdiction and the state in which you are doing the work, determine what your tax rate is and whether it is on material only or both material and labor. We use a bookkeeping program on our computer to provide the sales tax based on the jurisdiction. Then, depending on whether it is material only or both material and labor, enter the sales tax amount(s) in the row marked Sales Tax and in the appropriate columns D, E, or both.

Now you have the next Payment Application ready to be given to the customer, in conjunction with the invoice.

Miscommunication happens too often when dollar amounts are left floating around in the customer’s head due to making multiple payments strung out over the duration a large project.

Most customers don’t bother to write invoice amounts down and/or keep a running total. They’re just writing checks periodically with at vague running balance and then are surprised that the final invoice is more than they expected.

The Payment Application lets the customer see –

  • What the original contract amount was
  • What is included in this current invoice
  • What they have paid for previously
  • The total of what they have paid for previously and the current invoice
  • The percentage of the job that they have been invoiced for at this point
  • The balance of what they have left to pay

They get this updated information with each invoice and can easily see where they started, where they are, and what is left to pay.

This is how the Payment Application provides clear communication for the construction customer.

Having this business tool and learning to use it will not only make your customers happy…it will also help you to BUILD a successful construction business.

How Our Payment Application Tool Works to Help Build a Better Business

This is One of the Most Important Tools in the Construction Business Toolbox

Last week we talked about how construction companies struggle with cash flow and how not knowing what to expect can be very damaging to the business.

Communication between construction companies and customers is one of the biggest problems in the construction industry. The Payment Application is a business tool used for tracking project progress payments. It’s a way to communicate the financial expectations to the customer…and it’s only fair to let them know what to expect, when they’re the ones writing the check.

Construction customers don’t like surprises.

Our Payment Application is an Excel spreadsheet that lets the customer see the numbers before the project starts, continuing all the way through to the end…and this prevents them from being surprised at the end of a project with a bigger than expected bill.

The Payment Application is a document used to show the customer the price of a construction project broken down by item. It tracks the breakdown of payments being made, what has been paid up to this point in the project and what remains to be paid. This document is given to the customer with each invoice so they can see what they are being billed for on the accompanying invoice.

Starting with a blank payment application –

Step 1 – Filling out the project information – This process includes filling out the project information box with the customer’s name, the project name, and the project address. Next fill out the application information box with the application number, application date, project number, and the date the contract was signed. With each new payment application, the application number and date will be revised.

Step 2 – Filling out the scope of work information and value – This information will come from the signed proposal and will be entered in the first three columns on the left side of the spreadsheet. Using the proposal, take the number of the first item and enter it into the first cell on the column titled Item #. Next, write a brief description of the work described on the proposal in the column titled Description of Work. Finally take the dollar amount for this item on the proposal and enter it in the third column titled Scheduled Value. Once this is done you will repeat these three steps, one row at a time, as you go down the spreadsheet until you have all the information from the proposal entered on the payment application.

Step 3 – Confirm the dollar amounts – After all the values are entered, the total at the bottom of the Schedule Value column should match the total price of project on the proposal. If it doesn’t review the numbers in the Scheduled Value column until you find the mistake and correct it.

Now you are ready to use the Payment Application to accompany invoices. This will let the customer see what they are paying for. Seeing a large dollar amount broken down into smaller ones helps the customer understand what it is they are paying for.

It is a good idea to invoice for a percentage of a project prior to starting. This shows the customer’s commitment to the project and helps cover the contractor’s expenses on the project if something were to happen that puts the project on hold or stops it all together.

Entering the payment prior to starting in the application –

Step 1 – Determine the dollar amount for each item – Based on the predetermined percentage of the project prior to starting you will need to get the percentage of material and labor for each item. This information will come from the Worksheet used in the bidding process.

Step 2 – Enter the dollar amounts – The 4th and 5th columns of the Payment Application is where this information will go. These columns are the Work Completed columns. The 4th is material ordered, stored or used. The 5th is work done. Starting with the first row you will go down the sheet entering the percentage amounts in the corresponding column.

Step 3 – Confirm the dollar amounts – This step is the same as step 3 in the initial filling out of the form. It is to confirm that the dollar amount of the two columns added together matches the dollar amount given to the customer as the payment prior to starting.

Step 4 – Confirming percentage – Column H is a formula that is automatically calculated and shows the percentage this payment is of the total amount for each item. Once again you want to confirm this percentage matches the information given to the customer in the proposal.

We’re going to stop here today.

Next week we’ll get the Payment Application ready for the next progress payment.

This may seem like a lot of work, but it isn’t nearly as bad as it appears on the surface, and the benefits of communicating clearly with a Payment Application are well worth it.

The Payment Application is one of the best communication tools in the Business BUILDing Toolbox.

The Payment Application is Another Important Tool in the Business BUILDing Toolbox

This Tool Helps the Construction Companies See Their Cash Flow Ahead of Time

Concerns about cash flow is one of the biggest struggles construction companies and contractors face — and for good reason. These businesses typically lay out large amounts of money for project-related expenses. Waiting to get paid until the job is complete is a sure way for a company to go out of business.

This is especially hard on smaller companies with limited cash on hand when they are working on larger, long-term projects.

An alternative approach is for businesses to be paid when predefined stages or percentages of a project are complete, a model called “progress payments.”

Progress payments benefit all parties involved.

The Payment Application is an Excel spreadsheet that is used for tracking progress payments made on construction projects. A payment application is more than a simple invoice. It includes a schedule of values based on the proposal and the individual items included in the scope of work.

Construction companies aren’t banks and shouldn’t be carrying the cost of larger construction projects until they are finished. Progress payments help companies recover a portion of their costs for the project along the way, thereby maintaining a steady cash flow.

Payment applications can also protect companies in the case of client nonpayment throughout the construction process. At Timber Creek Construction we have a delay condition in our contract that we can stop working on a project if a progress payment is not received promptly. 

In the construction industry, a progress payment is a partial payment often made after the completion of a predefined stage of work — for example, demolition, concrete, framing, roofing or siding. These installments replace single, lump-sum payments at the end of a project or a “half upfront, half at the end” arrangements.

Making payments connected to the completion of a specific stage of work can create some confusion., For instance, does completion of concrete include sidewalks and garage approaches that may not be able to be completed until other things are done? That’s why at Timber Creek Construction we choose to make our payments based on periods of time rather than stages. We then determine how much has been done within the predetermined period of time and invoice accordingly.

Benefits to progress payments are:

  • Stable cash flow – Progress payments provide construction firms and contractors with a steady stream of income, thereby reducing the amount of working capital needed for projects. This makes it easier for companies to cover costs for supplies and labor throughout the project. This minimizes the need to go into debt.
  • Increased motivation – Reaching that next milestone to get that next progress payment is a great motivator in the construction industry. Being paid along the way can also drive productivity, reduce material and labor expenses, and result in higher profits.
  • Minimizing payment problems – Getting paid based on progress establishes a steady expectation of cash flow and when you should expect it. If payments begin coming in late, or not at all, it could be a sign that the client is having financial issues. Delayed payments help flag this early and can prevent the need to take legal action.
  • Opportunity to pause the project – If a customer doesn’t pay their progress payment for work completed, you may decide to pause work until the issue is resolved.

The one drawback to progress payments is like most other business-related activities…it means more paperwork.

Construction companies and contractors need to make sure they are paid. Most don’t have a dedicated financial or accounting department to handle that function. This puts that task on the basic office staff or the contractor himself.

This is where having a Business BUILDing Tool and a system to use it comes in.

Next week we’ll look at the specifics of our Payment Application and how that tool works.

A Proposed Change Order for a Construction Project is as Important as a Proposal

If So Many Issues Come from Not Doing Change Orders, Why Are They Not Done?

A Proposed Change Order is another very important tool that should be in the business toolbox of every construction company. However, it’s probably used less than almost any other business tool. Its lack of use causes as many, or even more, problems than any other tool.

If it’s that important, why is it not used?

We’ve discussed multiple times the reasons for doing Proposals for construction projects and the importance of communication with construction customers.

Proposed Change Orders are just as important.

If Proposed Change Orders are so important why are the done less?

The main reason for paperwork not being done is time. Time is the one thing that there is a limited amount of. There is more of everything else in construction. We can look for and find more help, job materials, money, etc. But, no matter how hard we look we can never get more time.

This time limitation is the main reason paperwork isn’t done. It’s easy to see the direct connection between production and revenue. Paperwork…not so much.

Doing a proposal or estimate is done before any construction agreement is made.  This has a direct connection to the cash flow and increases time being spent on them. If we don’t have construction work to do, we don’t get paid.

After the project is started though, our focus shifts to the construction of the project. From that point forward paperwork takes a back seat on the priority bus.

Like any tool…it costs more money if you don’t use it.

I was speaking with my mechanic earlier this week and he told me a story about a contractor that he knew, that took a $15,000 hit on a job because he neglected to provide the customer with a Change Order.

The contractor and customer agreed on the work that was to be done and a price of $20,000. While the contractor was working on the project, the customer asked for some additional work to be done. The contractor did the extra work.

When finished the contractor gave the customer a invoice for $35,000. The customer was furious and would not pay the additional $15,000.

Not communicating with the customer before the work was done cost the contractor $15,000.

Spending the time to do a Proposed Change Order would have been worth it.

A Proposed Change Order is like a proposal…it lets the customer know what to expect. It gives both the contractor and the customer clear expectations before costing either.

In my forty plus years in construction I have witnessed this story happen too many times.

In addition to the time needed to do a Proposed Change Order another reason for them not being done is simply not having a process in place for doing them.

This is common in the construction industry. Most people running construction companies were taught construction…not paperwork.

It doesn’t have to be this way.

That’s why we’re in the process filling up a Business BUILDing Toolbox with ready to use templates, fill-in-the-blank worksheets, instructions, and examples of:

  • Proposals
  • Contracts
  • Change Orders
  • Payment Applications
  • Profit Comparisons
  • Job Cost
  • Six-week Cash Flow
  • Savings Account Transfers
  • Etc.

This Business BUILDing Toolbox (future link) is just one part of the 5-step Business BUILDing Plan.

Fixing problems such as neglecting to do a proposed change order as discussed above comes down to –

  • Being aware that there are problems
  • Understanding those problems
  • Getting the Information about and Instruction of systems and processes needed to solve those problems
  • Learning to use those systems and processes
  • Delivery of your DREAM business

Check back to find out when the tools are in the toolbox and ready to go.

How to Bring a Construction Proposal to a Conclusion with a Contract

Putting A Period at The End of the Construction Proposal

The discussion of “Building a Better Proposal” began with the problems that arise from poor communication. We talked about this being the responsibility of the contractor and some of the reasons this is a problem.

Previously we laid out the “Blueprint for Building a Better Proposal” going over the different parts of the system, explaining the system, gathering of information, writing a scope of work, putting a price to the project and finally how to put all of the pieces together into a proposal ready to present to the customer.

Once you have a signed Proposal, you should conclude with a Contract.

The Contract completes the Proposal process and covers things beyond construction. Things like funding, additional documents, property boundaries, time within which the project will be started, and terms and conditions.

  • Construction Funds – This isn’t something that is relevant to every project but will be to some. If it is, the information would be included in this section of the contract.
  • Description of the Work – A complete and full Scope of Work could be included here but not needed if the customer has been presented a Proposal. If so then a brief description of the project can be inserted and a reference to the specific Proposal and any other additional documentation, i.e. blueprints, drawings, spec sheets, governing body documents, etc.
  • Property Lines – This is another category that isn’t relevant to every project but certainly can be. If working inside of city limits, normally there are set back requirements and easements, this makes it critical to know where the property boundaries are or to have a licensed surveyor make this determination.
  • Payment – Like the description of work above, this should be in the Proposal. If no Proposal was given to the customer, then this should be specified here. If a Proposal was given, repeat it again here.
  • Time for the Completion of Work – The duration of the work from start to finish is typically expressed in the Proposal. Due to the varying number of Proposals prepared and presented to customers, there’s no way of knowing what order they will be signed and returned. With the Proposal being signed and returned prior to the preparation of the Contract, the start date of the project can be determined and specified here.
  • Terms and Conditions – An in-depth explanation of specifications, descriptions, expectations, insurance, warranty, media permissions, etc. These will be specific to your company, type of work, and location.

I would recommend that you have a legal expert or attorney review your Proposal and Contract templates as well as any other agreement document to make sure they are sufficient and protect you and your customer.

We’ve gone through the process of meeting with a customer all the way to getting a signed Contract. Now it’s time to do the “construction” part of the project.

Just because you have a signed Proposal and Contract, don’t think the communication is done.

In most construction projects changes occur. These changes need to be treated like separate sub-projects of the original project with Change Orders. This is a topic of discussion for a different day…one that we’ll have in the future.

If you know anyone in a construction trade or related industry that you think would benefit from Business BUILDing Tools or learning about those tools and how to use them, feel free to share this Weekly Solution with them. For additional articles about other construction business topics go to the Solution Building website.

Having the Right Tool and Knowing How to Use It Can Make Things Much Better

The Thing to Remember About Tools Is…They’re Only Good if You Use Them

Over the last couple of weeks, we have discussed why it’s critical to save money for those big irregular expenses and unexpected emergencies. Next, we began the process needed to start building a “Rainy Day” fund by determining how much and for what. The Savings Transfer Sheet is like any other tool, it doesn’t do you any good if you don’t use it.

As is the case with everything that’s worth doing, starting is the hard part. Saving money is no different. It’s like digging a hole.

What if there’s an underground water line leaking in your backyard. You can see that spot where the grass is green in an otherwise brown lawn. The water bill is more than ever before and getting bigger each month. That doesn’t matter, the prospect of getting your shovel out of the tool shed and digging is more than you can bear to think about. So, you put it off and pretend that it’s not a problem.

The green spot in the yard keeps getting bigger and greener. The water bill keeps getting bigger too. You decide to cover the spot in the back yard with an above ground swimming pool. That took care of it…no more green spot. You know what they say. Out of sight out of mind.

Then one day you get a water bill that is so big you decide that you’ve got to do something. So, you drain the pool, get a shovel, and start digging. Then before you know it, you’ve uncovered the pipe, found the leak, made the repair, and filled the hole.

That wasn’t near as bad as you thought it was going to be. Once again, you are aware that this is one of those times when the overwhelming dread was way worse than the actual process. The next water bill is back where it used to be, and you wonder why you weren’t more proactive.

A shovel is a simple tool that’s easy to use. It can fix a problem before it gets too big, but only if you use it. If you don’t, the outcome can be devastating.

The same thing is true about the Savings Transfer Sheet. If you’ll take the time to get it out of the toolbox, spend some time learning how to use it, and use it regularly, it will make a significant difference to stop your financial leaks.

Wouldn’t you like to have your money filling up the pool rather than leak out of it.

If you would like to learn more about the Savings Account Transfer sheet, schedule a free 30-minute construction company consultation.

How to Build A “Rainy Day” Fund for Your Business

One of the Tools You Should Have in Your Business BUILDing Toolbox

Last week I wrote about the importance of having savings, both individually and in business, and the high percentage of people who don’t. The tendency to spend everything you have is a problem when the unexpected happens. I’m not saying that after you pay the bills every dollar should be saved.

What I’m talking about is having money ready for big, planned purchases or unexpected emergencies.

This way you can use your own money and don’t have to pay someone else to use theirs.

Last week I told you about the tool I use for this in my business, the Savings Transfer Sheet. This spreadsheet is easy to use and makes the process simple. What it doesn’t do is force you to save. If only there was just a way to hook peoples’ deposit tickets up to electricity so that they would get a shock when depositing money without saving.

The biggest problem with saving money is…not having a plan to do so. It can be overwhelming trying to figure out how much should be saved when depositing your revenue. One of the things that makes it hard is not having consistent amounts of income. If every week you deposited the same exact amount, you could decide once and always put aside a set amount for savings.

It’s rare in business that every job or every customer pays you the same amount every time you do business with them. There are some businesses like lawn mowing, hair cutting, pet boarding, etc. that a preset recurring price has been established, even so the number of recurrences each day or week is going to vary.

The purpose of this spreadsheet is to provide a simple accurate way to know how much to save every time.

As with most things, the most difficult part is the initial set up. This part requires some research, thought and time. Trust me…the time and effort will be worth it in the end.

  • First – Look back through your financial records of the last several years. The more research you do the more accurate your understanding will be of your financial history. Even if you’ve only been in business for a short time, it will be a good place to start. This will let you see areas of unexpected expenses as well as dollar amounts.
  • Second – Determine what things or areas that need to be saved for. Some examples of what these could be are:
  • Repairing and/or replacing equipment
  • Additional equipment or upgrades
  • Repairing or replacing vehicles
  • Large building repairs or maintenance items (HVAC, new roof, etc.)
  • Building or facility upgrades, expansions, or purchases
  • Taxes (income, property, sales, etc.)
  • Irregular payments (bi-monthly, quarterly, annually, etc.)
  • Retained earnings (money for emergencies…because they are going to happen)
  • Third – Take the dollar amounts for each area that you have determined to be above or outside your normal operating costs. Figure out the percentage of your net revenue each one is. This gives you a place to start when setting up the “Savings Transfer Sheet” for the first time.

Building a “Rainy Day” savings is critical to the survival of your business.

It’s a cornerstone in the foundation of your business allowing it to weather the storms of life.

Next week we will dig deeper into the “Savings Transfer Sheet” and see how the information we’ve gathered fits into it.